 I was on the way back from a client in Crawley and passed Harlow on the way,
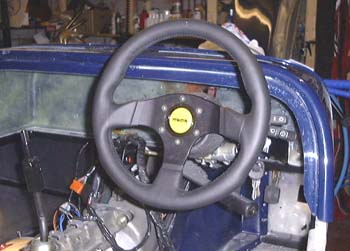
just before 5pm. So, I dropped in to see if they had the Momo steering wheel that I've been trying to get. They
had, so I left having bought that and a high-level brake light for the rear. The Dax one is a Hella unit which
fits through the rear panel. This is quite unusual as most light you buy are intended for putting inside a window.
I was on the way back from a client in Crawley and passed Harlow on the way,
just before 5pm. So, I dropped in to see if they had the Momo steering wheel that I've been trying to get. They
had, so I left having bought that and a high-level brake light for the rear. The Dax one is a Hella unit which
fits through the rear panel. This is quite unusual as most light you buy are intended for putting inside a window.
Later in the evening I fitted the wheel. I'm not sure what it is about Momo wheels, but they are great, IMHO...
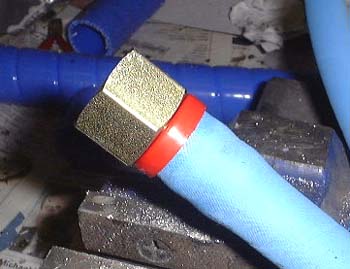 I've been collecting pipes for finishing off all the engine pipework, and most
things have arrived now. (Although, I still don't have the heater or the expansion tank.) Still I connected up
the remote oil filter using the push-fit connectors to make up some pipes of the correct length. These Autoquip
push-fit things look as if they work rather well, although fitting them involves a lot of grunting and shoving.
When they're on they look like the photo here.
I've been collecting pipes for finishing off all the engine pipework, and most
things have arrived now. (Although, I still don't have the heater or the expansion tank.) Still I connected up
the remote oil filter using the push-fit connectors to make up some pipes of the correct length. These Autoquip
push-fit things look as if they work rather well, although fitting them involves a lot of grunting and shoving.
When they're on they look like the photo here.
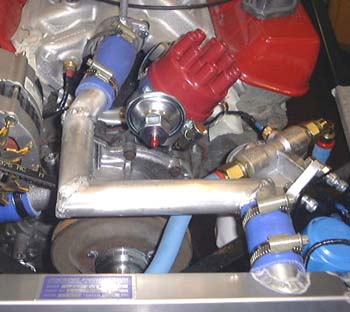
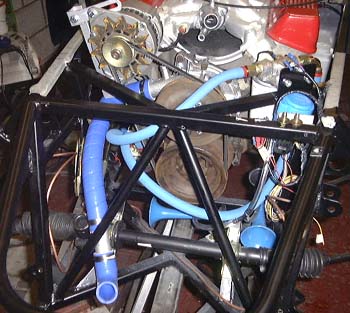 As well as fitting the oil hoses, I also made up a bottom coolant hose. This was a bit
tricky to get past the steering rack, and was made out of a three bits of silicone hose (one a flexible chunk)
and some aluminium tubing. However it looks alright now it's done. The problem is, all this pipework is making
the front of the car a lot more crowded. One worry is the difficulty that would be made by one of these
joints leaking. A lot of the car would have to be taken apart to get at it.
As well as fitting the oil hoses, I also made up a bottom coolant hose. This was a bit
tricky to get past the steering rack, and was made out of a three bits of silicone hose (one a flexible chunk)
and some aluminium tubing. However it looks alright now it's done. The problem is, all this pipework is making
the front of the car a lot more crowded. One worry is the difficulty that would be made by one of these
joints leaking. A lot of the car would have to be taken apart to get at it.
The bottom hose, by the way, is on the left of this photo.
 As that all seemed done (famous last words) I put the radiator back on and made up the
top hose, this time made out of just two pieces of silicone hose and a chunk of aluminium.
As that all seemed done (famous last words) I put the radiator back on and made up the
top hose, this time made out of just two pieces of silicone hose and a chunk of aluminium.
Everything was going swimmingly until I realised that this hose is going straight through the place that the distributor is suppose to be.
Rats!
Tomorrow I'll have to see what I can do...
 I tried fitting the distributor to see what the space looked like for the top
hose pipework. The problem is, the top inlet to the radiator is about at the level of the thermostat housing on
the inlet manifold. So, if the pipe is taken up and then down again it will result in an airlock, unless there
is a bleed valve of some sort in the pipe.
I tried fitting the distributor to see what the space looked like for the top
hose pipework. The problem is, the top inlet to the radiator is about at the level of the thermostat housing on
the inlet manifold. So, if the pipe is taken up and then down again it will result in an airlock, unless there
is a bleed valve of some sort in the pipe.
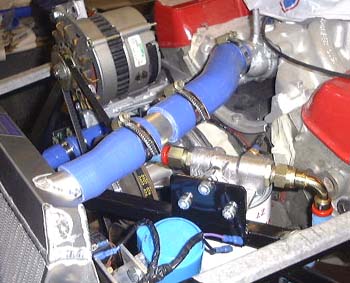
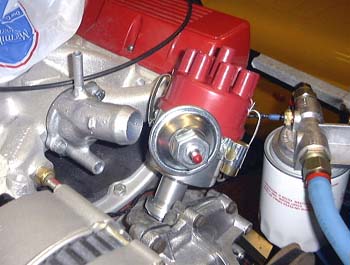
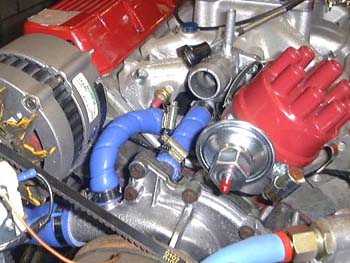
I think what I need to do is to bring the pipe in between the distributor and the alternator, both of which you can see in this photo. To do that, I'm going to have to make up some special pipework and modify the thermostat housing some more.
 So, I cut the thermostat housing apart again and welded it back together again so that
the outlet points at the gap between distributor and alternator. I then made up some pipework out of aluminium
tubing welded together that gets fairly neatly from the top connection of the radiator to the thermostat housing.
The problem is, it's not quite as neat as I would like so I'm probably going to have to do it again. However, this
is going to be a bit difficult as Cambridge appears to have run out of 0.8mm aluminium MIG welding wire...
So, I cut the thermostat housing apart again and welded it back together again so that
the outlet points at the gap between distributor and alternator. I then made up some pipework out of aluminium
tubing welded together that gets fairly neatly from the top connection of the radiator to the thermostat housing.
The problem is, it's not quite as neat as I would like so I'm probably going to have to do it again. However, this
is going to be a bit difficult as Cambridge appears to have run out of 0.8mm aluminium MIG welding wire...
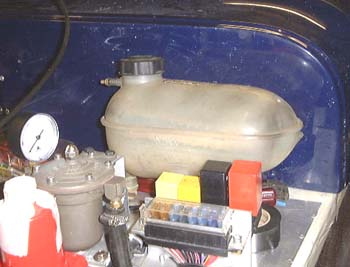 Another thing this weekend was a trip to the scrapyard. I was hunting for a
handbrake switch from a Sierra, which I found easily, and a suitable expansion tank. I got this one here from a
Sierra too, and I think I can make it fit fine with a couple of bits of bracketry. That will have to wait until
the scuttle is fitted though.
Another thing this weekend was a trip to the scrapyard. I was hunting for a
handbrake switch from a Sierra, which I found easily, and a suitable expansion tank. I got this one here from a
Sierra too, and I think I can make it fit fine with a couple of bits of bracketry. That will have to wait until
the scuttle is fitted though.
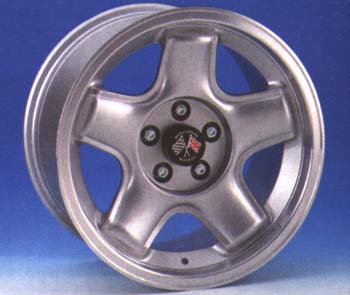 Finally, I have managed to sort out what to do about wheels. After a lot of
phoning I managed to talk to the people at Revolution about the RSX alloys. There is one person there (actually,
they are KN alloys these days) by the name of Warren who is quite hard to get hold of. However, when I finally
managed it he was very helpful. Although they don't make them in the exact size that Dax recommend it's very close
so I'll go with them.
Finally, I have managed to sort out what to do about wheels. After a lot of
phoning I managed to talk to the people at Revolution about the RSX alloys. There is one person there (actually,
they are KN alloys these days) by the name of Warren who is quite hard to get hold of. However, when I finally
managed it he was very helpful. Although they don't make them in the exact size that Dax recommend it's very close
so I'll go with them.
Interestingly, I mentioned to Warren about Dax using the Image 3 part alloys. He waxed lyrical for a while about how they used to make 3 part ones but now avoided it due to difficulties balancing them and keeping them airtight. If nothing else, he sounded as if he knew what he was talking about. Apparently, they now send me a pro-forma invoice and I write back saying that's really what I want. There's no huge rush as they won't be casting the front wheels for a while yet anyway.
 So, I set about trying to make the pipework neater. One ally was intended to be a mitre
box but I went to MacKays and found they were selling this mitre saw for the grand sum of £15, which made
it impossible to resist. (I have this thing about tools, you see.)
So, I set about trying to make the pipework neater. One ally was intended to be a mitre
box but I went to MacKays and found they were selling this mitre saw for the grand sum of £15, which made
it impossible to resist. (I have this thing about tools, you see.)
With this I was able to cut the tubing accurately for the new top hose.
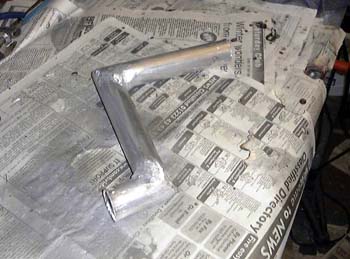
 After some measurement and welding I ended up with the top hose looking like
this. Of course, my aluminium welding is not up to much so water will probably piss out when I try to use it. However,
it's fun trying...
After some measurement and welding I ended up with the top hose looking like
this. Of course, my aluminium welding is not up to much so water will probably piss out when I try to use it. However,
it's fun trying...
 I've been very bad at updating the site for a while, just due to the pressure
of work as well as my snail like progress. This entry is a coagulation of the recent activity, although it didn't
really happen over this weekend. Sorry..
I've been very bad at updating the site for a while, just due to the pressure
of work as well as my snail like progress. This entry is a coagulation of the recent activity, although it didn't
really happen over this weekend. Sorry..
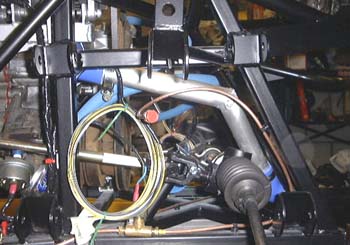
I carried on with the plumbing work. First of all, I wasn't happy with the flexible hose used for the bottom hose, so I made another ally tube, as seen here.
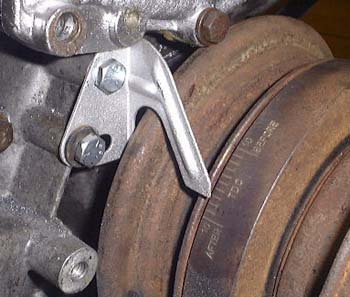 Having been fiddling with the distributor, I've been thinking about the engine
ignition timing. It occurred to me that I haven't had to adjust timing in the old fashioned way for many years.
Still, I realised that I needed to reattach the timing pointer. It took a while working out where it had to go,
and this seems to be the right place, if only because it fits here!
Having been fiddling with the distributor, I've been thinking about the engine
ignition timing. It occurred to me that I haven't had to adjust timing in the old fashioned way for many years.
Still, I realised that I needed to reattach the timing pointer. It took a while working out where it had to go,
and this seems to be the right place, if only because it fits here!
I think I'm going to have to get another timing light, as my old one is really an archeological curiosity. Perhaps I'll by some clever piece of diagnostic kit instead...
After that I reattached the fan switch, havimg ousted it with the oil filter. It's also occured to me that I need to find a place for the coil, and I'm having some trouble with this. It's getting very crowded on the front of this engine, I hope I never have to take it out again..
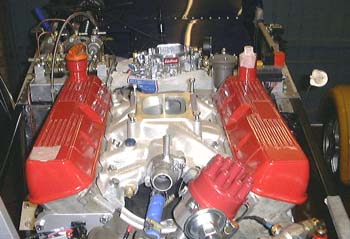 I decided that I ought to attached the inlet manifold properly, as up to now
it had just been sitting there. Unfortunately, I found that a lug on the rear right of the manifold fouled the
rocker cover slightly. Still after a bit of ministration from the angle grinder all was hunky dory. Although this
photo looks the same as some others, things are actually bolted down now...
I decided that I ought to attached the inlet manifold properly, as up to now
it had just been sitting there. Unfortunately, I found that a lug on the rear right of the manifold fouled the
rocker cover slightly. Still after a bit of ministration from the angle grinder all was hunky dory. Although this
photo looks the same as some others, things are actually bolted down now...
The other addition here is a dipstick! (It's the thing sticking up on the right!) I have decided that I need to work towards a test running of the engine, before fitting the bodywork sides. This is going to mean that I have to fit and remove the exhaust systems, but should be worth it to get the thing running before I get too far in cocooning it. Hence, I've filled the engine with oil! Of course, I hadn't done the sump plug up properly so some of it leaked out on the floor, but it's the thought that counts...
 I've finalised the cooling pipework on the front of the engine, sorting out the thermostat
bypass and the heater return. For the latter I used the pipe that was attached to the original inlet manifold.
I had intended to make another new pipe, but the original one was fine. The only problem is that the Edelbrock
manifold doesn't have the mounting points that the original one had, and as I'm reluctant to drill and tap the
manifold I'm probably going to hold this in place with something a bit gruesome.
I've finalised the cooling pipework on the front of the engine, sorting out the thermostat
bypass and the heater return. For the latter I used the pipe that was attached to the original inlet manifold.
I had intended to make another new pipe, but the original one was fine. The only problem is that the Edelbrock
manifold doesn't have the mounting points that the original one had, and as I'm reluctant to drill and tap the
manifold I'm probably going to hold this in place with something a bit gruesome.
This photo shows the two pipes that connect to these runs, connected to the water pump at the bottom. I'm having some trouble finding the proper bolts to hold the water pump in. A couple of the ones on the original engine were sheared, hence the problem. I think I might have to resort to buying some 5/16" UNC studding and using that with some nuts instead.
in case you've got to this frame directly and can't get out, go here.