Bright and early, I set off for Real Steel, who are in Uxbridge, quite close to Heathrow. On the way there I was debating a couple of recondition/exchange issues. The first of these is the con-rods. I could get exchange rods, or carefully inspect the ones I've got and get by with them, albeit probably getting new bolts. I ended up deciding to stick with the old ones.
The other issue is the crankshaft. Again, I could get an exchange shaft, or get the machine shop to regrind and check the existing one. Again, I decided on the do-it-myself option, mainly as I was getting all tight-fisted for no good reason.
I picked up most of the bits that I wanted from Real Steel, with the exception of the lifters. On the phone they said they had a set--and put them aside for me. However, when I got there they said that there were only 14 in the set. They apologised profusely and promised to send them on, for free, when they get new ones in which is currently promised for this week. I was very impressed with the chaps at Real Steel, who seemed genuinely helpful and knowledgeable. They also have some interesting customers. There was a chap in there getting something for the distributor for his Ultima. He reckoned that this car had an ex-CanAm engine in it which produced in the region of 600bhp. Probably an over-estimate but all the same...
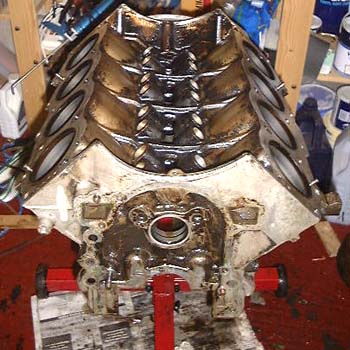 I'm on the finished stretch of cleaning up the engine now. Today I spent a while cleaning
up the pistons and rods, as I now want to use the rods and I'll have to get the machine shop to press the existing
gudgeon pins out of them. I also cleaned most of the grot out of the block, although there still a lot of it left,
and the heads. It's amazing how underneath all the accumulated oil sludge there actually seems to be some fairly
clean bits of metal. I also cleaned up the crankshaft, although I had to use a wire brush to get the rubbish off
the webs of this. I tried to make sure that the oil ways in the crank were all cleaned out properly by pulling
Jizer-soaked rags up them. Underneath everything the crank looks fine, although the bearing journals are a slightly
scored.
All I need to clean up now is the rocker assemblies and the rocker covers (which look horrible) and the engine is completely clean. All I need to do is do some machining and put it together! One of the things I got from Real Steel was a complete set of gaskets for the engine to assist with putting it together. There's a huge number of them, including some I do not recognise at all...
One thing I did clear up was the letters stamped in the side of the block. There is, in fact, one of these stamps for each cylinder and the pistons have similar stamps on their crowns. They're clearly size codes for cylinders.
One thing I did do was to measure the size of the existing pistons and compare it with the new ones. Luckily, even though I only have a vernier caliper to use to measure them, there is a definite 20 thou difference in their diameter, which is correct. The new pistons are also positively shiny...
There was a curious delay in the business of the day, half way through and I rushed the block, pistons, etc.,
off to Cambridge Rebores. Colin there admitted to having a bit of a thing about the Rover V8 engine (he was stroking
it fondly at the time) so I have high hopes for a good job. He convinced me that to let him reface the block slightly,
in order to make sure everything's flush. There's a lug on the casting that will have to be removed to do this
(you can see it at the bottom right of the photo above) but there seems no reason why it shouldn't be removed.
It should be done at the weekend so we'll see.
What I need now is to sort heads out. After the demise of the Real Steel option I have been wondering about having
a hack myself. There were a pile of heads at Cambridge Rebores so they can presumably do valve seats and the like
there. There's a chap on the se7ens list (Dave Andrews) who does a lot of his own head work and who seems amenable
to giving advice. It would save about £500 which is not to be sneezed at either. Perhaps I'll see what I
can read up about it first. In the meantime I'll have a good look at the rocker assemblies, having discovered that
replacement ones are of the order of £250 for set.
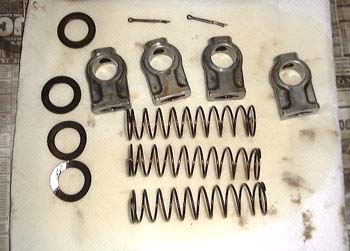 I took one of the rocker arms apart and it was indeed in pretty dire condition.
The only bits that are really serviceable are the pedestals, spacing springs and washers, as shown here.
There is apparently a wear problem on the Rover V8 engine of the rockers digging up into the bottom of the rocker
shaft. This was indeed what seemed to have happened here. Clearly, the hydraulic tappets did their stuff and took
up all the slack.
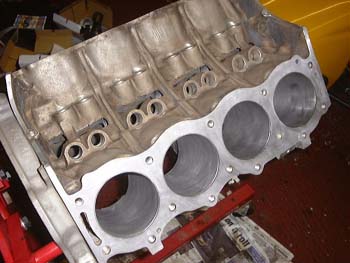 We went up to Burwell to pick up the bits of the engine and, after a short detour on account
of forgetting the crankshaft, took it all back home. Everything looks pretty good, pretty clean block, shiny bores
and block faces, shiny crank bearing surfaces. One problem was I got the machine shop to source the main and big
end bearings, as I thought they would want to make sure they got them the right size. Unfortunately, they charged
me about three times what Real Steel would have done...
Later on I starting putting it all back together, which is going to take some time.
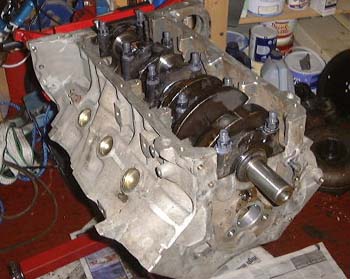 First of all, the crankshaft was re-installed, this time using studs rather
than the standard bolts. I checked all the bearing clearances with Plastigage and everything was in tolerance.
According to the Haynes manual you are "strongly recommended" to use a special Rover tool for refitting the rear seal. As I don's have this I just tapped it very carefully into place. I hopes it's OK as oil all over the clutch wouldn't be fun.
With that done it was time to set about the pistons. Of course, there's twice as many as I'm used to which means this bit is going to take me ages...
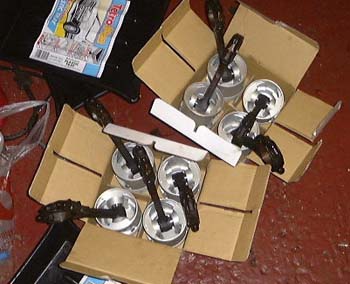 The first step was to check the fit of the new rings. They are not OE rings,
having come from Real Steel. Interestingly they quote the ring end-gap as being rather tighter than the OE spec.
All the same, the gaps were checked and the pistons, seen here attached to the rods,
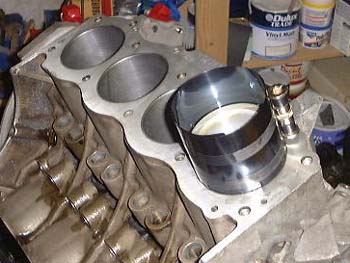 The rings were then assembled and the pistons installed using a recently acquired
ring compressor. It takes ages to do everything to install one piston: gapping the rings, installing the rings
and checking groove clearance, checking the bearing fit using Plastigage. However, I guess it's well worth doing
it right.
By the end of the day I had managed to do two of them. What's more the crank is much stiffer than it used to be, probably something about the engine needing to be run-in.
With luck I'll get the other six done tomorrow...
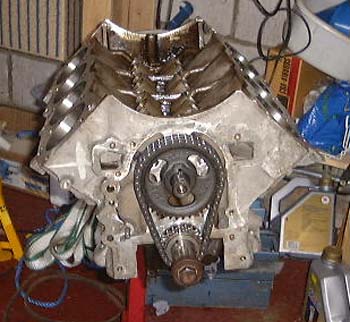 Well, I did get the other six done. However, while putting the rings on the
last piston I noticed that I one second compression ring left. There were two possibilities: either I had missed
one off or there were nine in the packet. As the consequences of the first were too horrible to contemplate I took
the whole lot out again.
Inevitably there were a complete complement of rings. However, in the process of removing the last piston I managed to score the big end bearing shell rather badly. I suppose I could rub it down a bit but that seems rather daft and I'll order some more bearings tomorrow; the Real Steel price is only about £15.
One problem that there is, which may not be a problem, is that the crankshaft was getting very difficult to turn over as I added pistons. With no pistons it can be turned over with a couple of fingers. The friction from each new bore rapidly overwhelms the crank and things get very stiff. I'm hoping that there's nothing wrong and it's just friction from the not run in bores and so on but all the same it's a bit worrying. It's certainly not lack of oil, which is all over the place!
Having screwed up on the piston front I retrieved the situation by installing the new camshaft, which fitted snugly in the new cam bearings pressed into the block, and the new timing chain. This, at least, fits nicely in that there is what seems the right amount of slack in the chain. There are three positions for installing the Cloyes chain, giving ±4° of valve timing. I installed it in the standard position, preferring to leave such issues to the cam profiles themselves. I had some trouble refitting the rest of the things on the front of the camshaft (the unused fuel pump drive and distributor skew gear), but finally worked out the order they should be installed in.
in case you've got to this frame directly and can't get out, go here.