As mentioned, we went down to Dax in Harlow to see about changing the colour. However, after much faffing about we decided to leave it as it was. I modified the order very slightly, deleting the order for a wiring loom and adding a V8 propshaft to it.
The reason for deleting the loom is that a couple of things that I've seen make me less than convinced about their looms. For one thing they apparently rely on multiple earth connections to the chassis. This is something that I've always found fraught with difficulty due to the problems of making a decent connection. Furthermore, some discussion on the dax mailing list went to the effect that the lighting wiring could get hot. Although acceptable from a safety perspective hot wiring implies a loss of power for what the electricity is intended for, which is not good engineering.
Not buying a loom will mean, of course, that I have to make my own. There's a company that often exhibits at the kit car shows that actually sells all the bits needed. I seem to remember that they are called Premier Wiring. Perhaps if I go to the Donington show in a couple of weeks I'll be able to find out.
 While I was in Harlow I got the guys there to modify my steering column. The
Rush needs the column to be lengthened by about 250mm, with a splined end to go into the lower column.
You can see the new bit at the left of the column in the photo here.
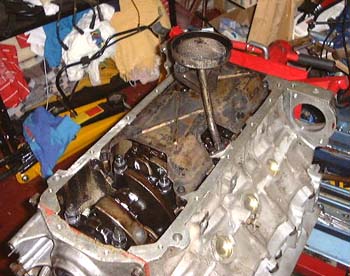 It's just about the end for the engine build now and I am finishing off bits and pieces.
I reassembled the sump, windage tray and oil pickup today. I am aware that I really
need a baffled sump, but it can wait for now.
I made a list of all the things I need to do to really finish off the engine and gearbox. It's surprising long really. The most significant items are:
- I need to get a new water pump as the original one is knackered. There's actually a possible variation here in that I could use a shorter pump, but would probably need a modified crank pulley to match. The existing SD1 crank pulley is actually rather bashed about and a newer (even better smaller) one would be rather nice. However, I suspect the existing one will do. However, I'll leave this until I get the engine in the chassis so that I can see what clearance there really is.
- I need to sort out the carburation. I'm still wavering between getting a Weber 500 and using the SUs that I have at the moment.
- I need to get a decent alternator and fix the mounting for it.
- I need to fit the flywheel and clutch that I got from DJ Ellis. The problem with this is that I need to take
the engine off the stand to do this as the stand is bolted on where the flywheel needs to go. Before I can do this
I need to get some bits I'm still missing for the clutch. I'll phone Dave Ellis about these, but Rimmer Brothers
list them all in their catalogue anyway. The bits are:
- Release bearing.
- Operating lever.
- Lever pivot pin
- Slave cylinder push rod.
- There are some top hat washers that attach the remote to the gearbox, again I'll ask Dave Ellis about these first.
- I need a gear lever! I have a suspicion that these are a little thin on the ground, we'll have to see.
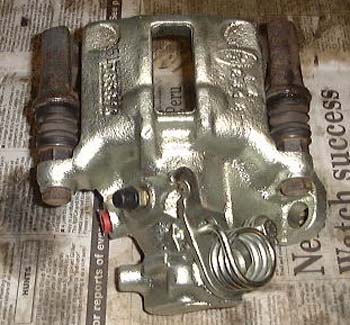 Attentive readers will remember the indecision about whether to re-condition the rear brake
calipers. I finally decided to get some exchange items which I did through a direct trade link, meaning they cost
me a bit less than they would have done. I spent a bit of a while today mounting the pad carriers onto the calipers.
(The carriers are not re-conditioned themselves.) The reconditioned calipers certainly look very nice and shiny!
I'll have to put some thought into how I actually get the bits for the kit itself. Dax are supposedly starting to build it all on Monday (September 4th) so it's only a couple of weeks away. The only problem is that the weekend that's two weeks away is the weekend of the Donington show, meaning that the Dax factory will probably be shut anyway, even if I decide not to go to the show myself.
I phoned Dave Ellis again and ordered the various clutch bits that I'm still short of. I think the only bit missing now is the gear lever itself, a reversing light switch (which connects next door to the lever) and something to blank off the speedo drive.
I want to use an electronic speedo, as I think mechanical ones are the spawn of the devil mainly because of the horrible great cable they need. Therefore, I don't need to use the speedo drive from the gearbox. I will probably try and use a similar system to the Westfield, which is certainly possible if I were to use the same VDO instrumentation, which uses a sensor that detects the Lobro joint bolts going past on one of the drive shafts.
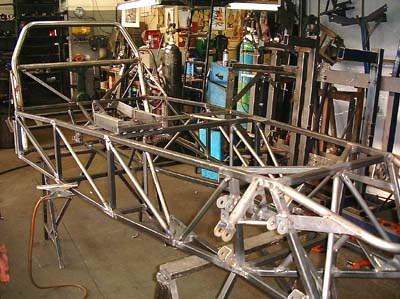 A bunch of friends went down to Dax yesterday, and actually saw my chassis being
welded together. This means I'm really going to get the bits soon, and need to organise a stack of stuff. This
chassis is actually mine, although unfinished and obviously un-powder coated.
This photo is courtesy of Duncan Hurst to whom all rights are...blah, blah, blah...
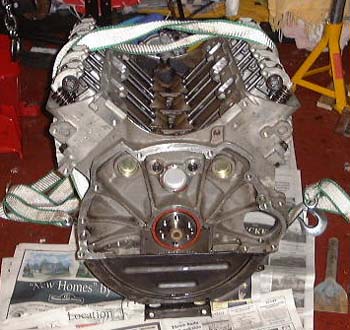 As I'm getting to the point where I need to attach the gearbox, which needs access to the
rear of the engine, I hoisted the engine back onto the floor and put the engine stand away. (Anyone want to borrow
it?)
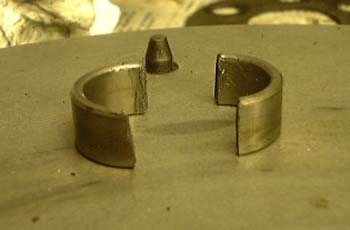 I removed the spigot bush in the end of the flywheel, as it was still the old automatic
one. Getting it out was a bit tricky, solved by sawing it in half!
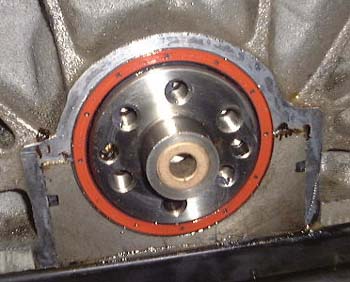 After that, bashing in the manual spigot was easy. Then came fitting the flywheel
and I rapidly discovered that the bolts from the automatic drive plate are too long for the manual flywheel. These
are rather important bolts so I think I'll phone Rimmer Bros tomorrow and get the proper ones.
That all means that I'm still stymied on the flywheel/clutch issues. (Also the bits haven't arrived from Dave Ellis yet.)
So, I got on with one of the bits that I haven't got around to doing from ages. This is replacing the boots around the Lobro joints on the rear driveshafts. The problem with replacing this is that, being tubes, you have to take the entire shaft apart to get at them. I am always a bit concerned about this as the bolts that go through the joints have a reputation for being completely impossible to shift.
All the same, I set about it and got one of the shafts apart fairly easily. The joints actually look in fine condition, but I'll repack them with new grease (which is in the box with the new boots that I bought a while ago) anyway. Of course, getting the old stuff out is pretty messy.
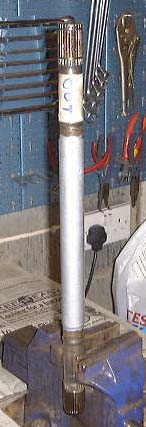 Having got everything in bits I thought I'd carry on the theme by painting the shaft silver.
It's completely unnecessary, but gives at least the illusion of cleanness. Of course, it also means that I have
to stop for the day...
Phoned Rimmer Bros and ordered some new flywheel bolts. This must be the smallest order they've ever had. I was wondering about asking them about a gearstick, but I though I'd start with scrappies there, perhaps posting something on First Choice like I did right at the beginning of all this.
In the evening I reassembled one of the driveshafts and started dismantling the other.
 I phoned up Dax today to see when the bits will be ready for collection. Apparently, it
should be Saturday. The next thing to organise was getting the cash, which was easily done. However, the next problem
is a van and some fuel to put in it. There's a nationwide blockade of fuel taking place at the moment which means
that things are getting very tight on the fuel front. This is very frustrating and could easily prevent me getting
the car for some time yet.
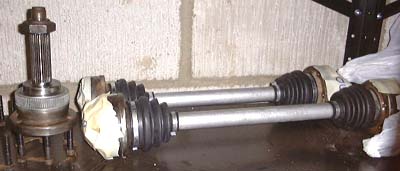
In the evening I pressed on with a few other issues. First of all, I finished sorting the driveshafts. They now look nice and clean with their new boots and are much more pleasant to handle. In the process of doing this, the Lobro joints have all been exposed and look quite good. At least I now know they won't be zapped by knackered boots.
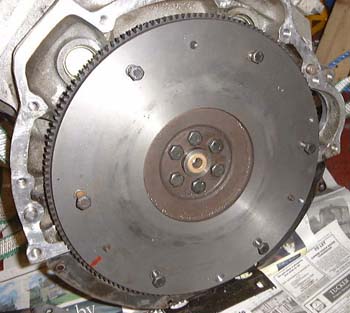 Next, I moved onto the flywheel. The bolts from Rimmer Bros
arrived today so it was fairly easy to bolt it into position. While there I noticed a problem. There a thin steel
plate that blocks off the entry to the bottom half of the bellhousing. You can just see it behind the bottom half
of the flywheel in the photo. This plate appears to be different for automatic and manual versions, fairly obviously
as the clutch has to be accessible in one case but not the other.
I think what I'll have to do is to remove the plate while fitting the gearbox and do some modifications so that I've got room to mount the slave cylinder.
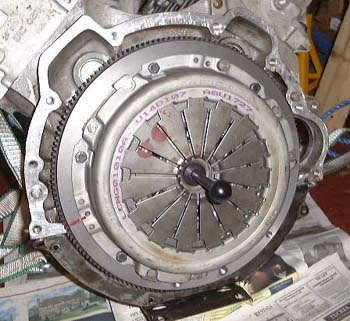 After that I mounted the clutch on the flywheel, making sure to keep it in the
position that it was balanced in, and using a tool to ensure that the driven plate is central.
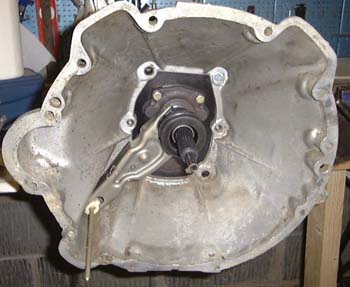 I seem to be just about at the point where there's nothing to do, other than
a stack of odds and ends, before the bits arrive. It's probably an illusion though.
I mounted the clutch release bearing and arm inside the bell housing, having attached the bell housing to the gearbox itself. I haven't got the correct bolts for this, but I'll get some from MacKay's at the weekend.
I spent a short time cleaning up the alternator. This is a rather decripit looking old piece of Lucas kit but it's probably worth seeing if it works before getting an exchange one. It's actually quite satisfying wire brushing all the clag off the alternator and it's mountings. It's removing some of the frustrations about the lack of fuel. (See above.)
in case you've got to this frame directly and can't get out, go here.