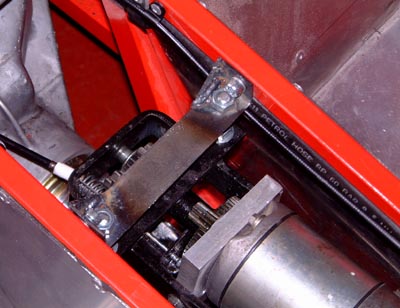
 I had had a small problem with the reverse unit and as a consequence I adjusted
the mountings a bit. So much so that at first nothing worked anymore. I've noticed a problem with mounting the
reverse unit where it is. This is that when the motor starts up, even with the rear wheels off the ground, then
there is a bit torque reaction through the mountings that flexes the tunnel top chassis rails a noticeable amount.
I had had a small problem with the reverse unit and as a consequence I adjusted
the mountings a bit. So much so that at first nothing worked anymore. I've noticed a problem with mounting the
reverse unit where it is. This is that when the motor starts up, even with the rear wheels off the ground, then
there is a bit torque reaction through the mountings that flexes the tunnel top chassis rails a noticeable amount.
Clearly, strengthening the chassis here is not feasible. (Although, just putting the tunnel top on will stiffen things up a bit.) I guess I'll just have to hope that it's OK.
 After that little bit of fettling I turned my attention to the harnesses. A
while ago, as I was in the process of abandoning the GRP boot floor I mounted a vertical "wall" at the
rear of the boot area. I always knew that I'd put this in front of the harness mounts and would have to modify
something at some point. I was originally thinking I'd just put a couple of slots in the "wall" but I
think the regs* say that there should be a bulkhead of some form between me and the tank.
After that little bit of fettling I turned my attention to the harnesses. A
while ago, as I was in the process of abandoning the GRP boot floor I mounted a vertical "wall" at the
rear of the boot area. I always knew that I'd put this in front of the harness mounts and would have to modify
something at some point. I was originally thinking I'd just put a couple of slots in the "wall" but I
think the regs* say that there should be a bulkhead of some form between me and the tank.
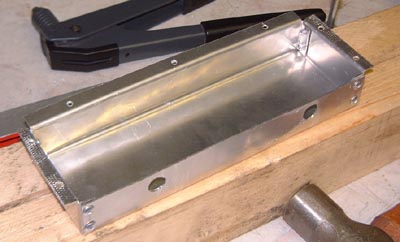
Hence, I hatched the plan of putting a little aluminium blister on the back of the wall, and this is what I did this evening. This little box here is the aforesaid blister which fitted behind a hole hacked in the wall.
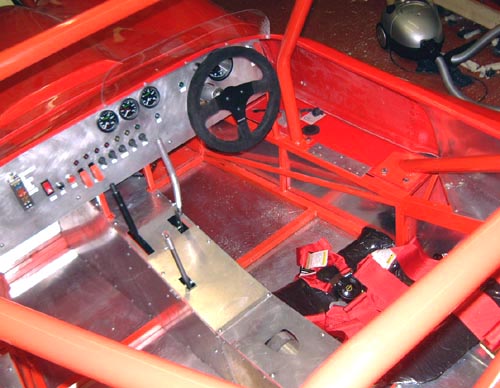
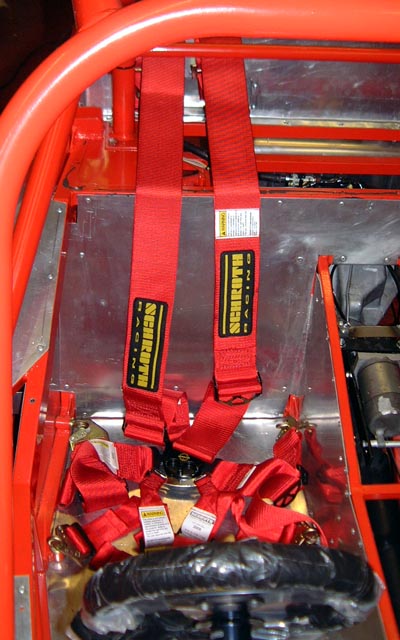 Once that was done I could put the driver's side harness in. The Schroth harness that I've got came
with a really good collection of mounting hardware so it was pretty easy to mount. I've not adjusted any of the
belts yet, so there's a half a mile of extra stuff in the shoulder straps.
Once that was done I could put the driver's side harness in. The Schroth harness that I've got came
with a really good collection of mounting hardware so it was pretty easy to mount. I've not adjusted any of the
belts yet, so there's a half a mile of extra stuff in the shoulder straps.
Hopefully, I'll be able to do something similar for the passenger side tomorrow. (Although I don't intend racing with a passenger it'll be useful to have a (fairly simple) harness there for shakedown running.
*(Sorry Dan, I promise I'll stop reading it one day.)
 I'm now on a really constrained schedule, trying to get to the Bruntingthorpe day on Saturday.
This entry is therefore a coagulation of a couple of days with far too little sleep!
I'm now on a really constrained schedule, trying to get to the Bruntingthorpe day on Saturday.
This entry is therefore a coagulation of a couple of days with far too little sleep!
I made another one of those boxes so as to fit the passenger side harness. This is a cheapie 4 point harness which, to be honest, isn't really big enough. I think I'll have to get another longer one as, as it is, it isn't good. I certainly couldn't use it.
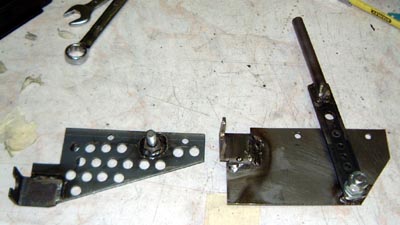
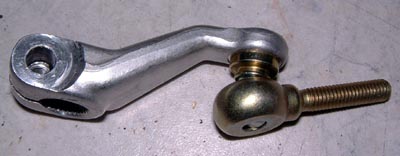 The main thing holding me up now is the gearchange, which doesn't exist. Luckily
I got, really quickly, this device which is the proper Honda part for little arm that goes on the gearchange selector
lever.
The main thing holding me up now is the gearchange, which doesn't exist. Luckily
I got, really quickly, this device which is the proper Honda part for little arm that goes on the gearchange selector
lever.
I did wonder if I could use that threaded rod on the right but after I realised that it was threaded left hand I just cut it off.
The problem with the gearchange device as supplied by the Kit Car Workshop is that as it's set up it will make the change work with forward for up, which I have become convinced is wrong. So, the first attempt was to abandon the copy of their bracket, as mentioned before, and do something different.
 What I did was to make this device which extended the Honda lever. This reaches across
underneath the propshaft (you can see it above the lever) meaning that the sense of the cable is not correct.
What I did was to make this device which extended the Honda lever. This reaches across
underneath the propshaft (you can see it above the lever) meaning that the sense of the cable is not correct.
However, it became apparent that this was not useful as the travel at the end of this lever was more than that permitted by the cable.
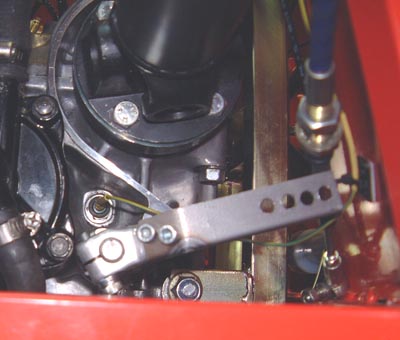
 So, it was back to plan A and I finished my copy of the gearchange bracket which was bolted in position
to the alternator and water pump, as shown here.
So, it was back to plan A and I finished my copy of the gearchange bracket which was bolted in position
to the alternator and water pump, as shown here.
(For the experienced welders out there; yes, I know the HAZ looks rather large on that weld but it was late, ok?)
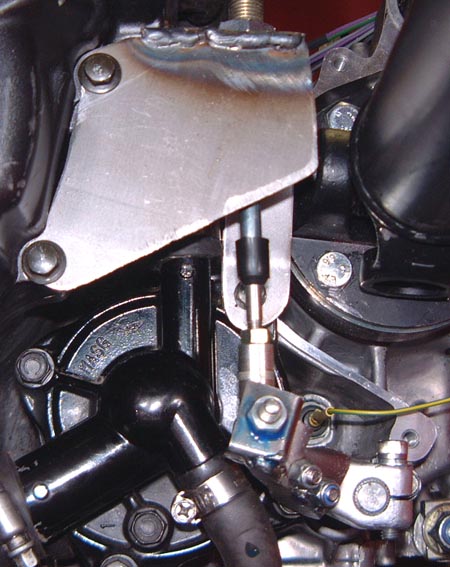
The cable was attached to the selector arm by yet another special adapter to the Honda bracket. As you can see, this is turned around from the previous photo. The bracket needed considerable care owing to the wierd angles necessary to clear the various water pump bits and pieces.
However, I could now at least attach the Kit Car Workshop lever at the other end and I had a gearchange that worked, albeit in the wrong direction!
 I celebrated by driving the car into and out of the garage a few times. Apart from a little stutter
in reverse this was the first time that this had happened and so a great milestone!
I celebrated by driving the car into and out of the garage a few times. Apart from a little stutter
in reverse this was the first time that this had happened and so a great milestone!
Pity I was too knackered to appreciate it!
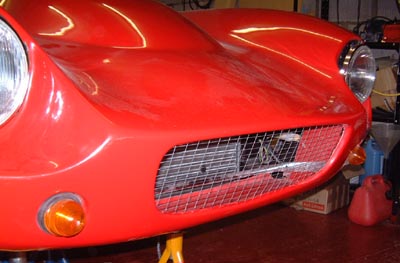 I celebrated by doing a couple of minor things, including putting some coarse mesh over
the nose entry to try and stop the worst of the leaves and dead pigeons clogging up the radiator.
I celebrated by doing a couple of minor things, including putting some coarse mesh over
the nose entry to try and stop the worst of the leaves and dead pigeons clogging up the radiator.
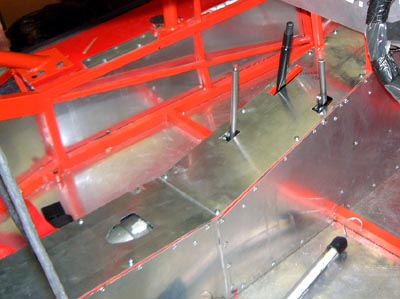 Continuing the cosmetic-ish theme I also closed in the top of the transmission tunnel which
makes the interior of the car seem much better.
Continuing the cosmetic-ish theme I also closed in the top of the transmission tunnel which
makes the interior of the car seem much better.
I also panelled in the hole above the diff left after removing the GRP boot floor.
This all left me, I thought, with a car that worked and I could now do things that weren't absolutely necessary.
 The first, and major, thing was to make the gearchange work the other way around. This
was done by changing the pivot point on the lever to below the cable attachment rather than above. This has the
disadvantage of making the lever much less precise as the pivot point (which is just an M10 bolt) is much further
away.
The first, and major, thing was to make the gearchange work the other way around. This
was done by changing the pivot point on the lever to below the cable attachment rather than above. This has the
disadvantage of making the lever much less precise as the pivot point (which is just an M10 bolt) is much further
away.
However, with this lever in the gearchange did at least work in the correct direction. However, the pivot point really needs to be moved as the lever "points" too far to the rear. I quickly bodged a bent aluminium tube onto the top of the lever to try and correct this but I ought to make a better device at some point.
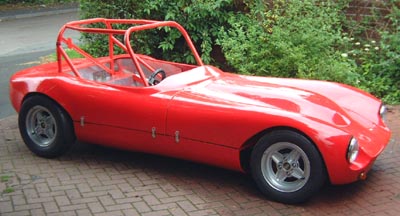
Finally, he said hopefully, I made a seat. This was bodged using some two-part foam and some bin bags. It's not as easy as it sounds and we made about 4 of them, in various grades of unsuccess. However, I ended up with something that would at least do in the short term.
Really, finally, I finished off by bodging an "aeroscreen" from a piece of flat polycarbonate rivetted vertically to the front of the tub. Not pretty but hopefully, it'll work. After that, and at and at last we were ready, or so I thought, to have a go.
In celebration I've created a new "driving" section of this site, you can find it here where you can find out what happened on the first outing.