June 24th
Phoned Westfield again, about the reverse switch connector. They say they will send me what I need. It remains to be seen what arrives this time.
Spent a small amount of time doing a couple of bits and pieces. One was to torque up the gearbox mountings, which I had omitted to do when we put the engine in. Unfortunately, one of the studs sheared. This is very annoying as the top side of the mounting is rather hard to get at, as it's underneath the gearchange assembly. Still the worst scenario is taking the engine out again. It just has to be easier the second time.
June 25th
Managed to get at the top of the broken gearbox mounting, using a long extension and a universal joint on a socket threaded through the gearchange. With luck I will be able to jack up the back of the gearbox enough to change the mounting without having to resort to lifting up the entire engine and gearbox assembly.
I spent a while torqueing up the bolts on the Lobro joints. Now I have the handbrake half working it's possible to lock the wheel enough to do this. It would also be possible to torque up the propshaft to differential bolts but owing to the aforesaid gearbox mounting issue, it will have to wait.
June 26th
It's the weekend again, and therefore time for more real Westfielding. The problem is there's all sorts of household jobs, to say nothing of mowing the lawn, that really need doing instead!
Still, the first jobs was attaching the fuel pump. 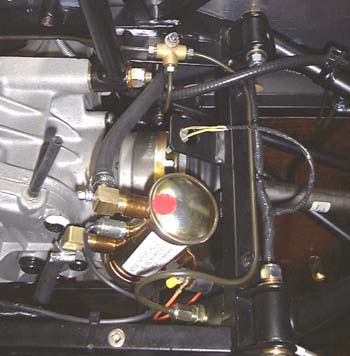 This was a bit of a fiddle as the fuel pipe is very difficult
to persuade onto the fittings. What's more, the wiring connections for the pump are mysteriously on the opposite
side of the car from the pump's location and have to be extended.
The other issue is the Heath-Robinsonesque nature of this bit of the car is now worsened as there is a fuel pipe going through the middle of everything. I've got a suspicion that I'm going to take a lot of this apart at some stage and make it look better.
Next thing was the steering column. I attached the lower column between the upper column and the rack. This, not surprisingly, refused to go in without undoing the upper column first, even though the build manual says to torque it up at an earlier stage.
Still, I can now sit in the car and, with the aid of a Mole grip, make the front wheels turn left and right! Very satisfying. Problem is, it seems very stiff, which even just the upper column on its own did. It might be that this is because I'm not used to steering with a Mole grip or even, horrors, that I'm not used to steering without power assistance.
Since I put in the engine, I've been looking at the loom trying to figure out what everything is. The lack of a proper wiring diagram in the manual is a bit if a pain, but I must admit it's probably my fascination in things electrical (since the age of 10) that's provokes me here.
One particular issue is the fan connections, particularly as there are a couple of large connectors at the back
of the engine which are part of this and don't fit together; they're the wrong sex. (Well, it's not quite that,
but it will do.) Still, I've finally figured this out in that the small extension that's noted in the build manual
as required is that this connector at the back of the engine actually has to connect to the fan switch that's to
be installed in the radiator. The radiator, as is normal, is to be installed at the front of the car.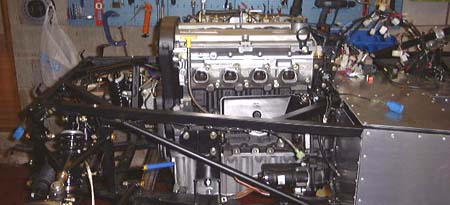
I managed to work this out using the poorly photocopied scruffy sheet that came stuffed into the back of the bag that the loom came out of. Although this isn't a real wiring diagram, you can figure out what's going on with a lot of thought.
You can see the connectors in question in this photo. The blue block that's resting on top of the footwell has to be moved forwards to the radiator.
As far as I can see this farce is due to the loom being the same for either a ducted or non-ducted nose cone. In my case I ordered the ducted nose, which is supposedly a bit better at cooling and, to my mind, looks a little better.
 I
installed a bit of the engine related wiring, connecting up the alternator and starter motor. However, the latter
will have to wait for the arrival of the battery connections to be finished.
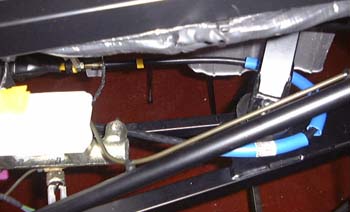
I also installed the clutch cable which, if you've being paying attention, you will remember was a worry in that it was sticking out the front of the car. I must admit it bent around quite nicely, you can see it here going around the right hand engine mounting which seemed the best place for it.
I can now sit in the car and press up and down on the clutch pedal at the same time as steering with a Mole grip. Cool!
 The last job of the day, and probably weekend, was to connect up the horns. Confusingly, the build
manual says that a ducted nose has an electric horn as opposed to the air horns supplied with the non-ducted nose.
Whatever, I have a ducted nose (well, the car does) and air horns. I guess I'll just fit them anyway and find out
what the problems are, if any, later. The obvious problem is that there's going to be some issue with the cooling
pipework (of which there appears to be a huge amount). However, I can't see what it is.
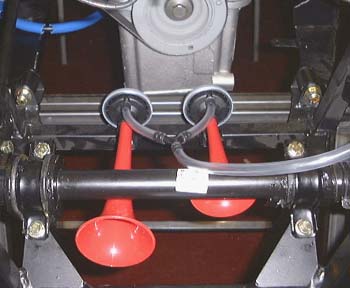
You can see the horns here, nestling underneath the steering rack:
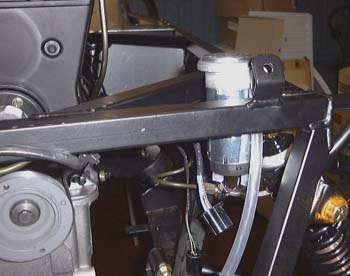 Here's
the compressor, which is bolted to the chassis near the top of the left front suspension:
It seems as though progress on this car is slowing down, as there are a lot of simpler but fiddlier jobs to do. In a way this is good, as I don't want it to be finished too quickly. However, I'm getting close to running out of bits again, I'll have to give Westfield another ring...
Started installing the fuel tank. However, there's two issues. The first is that I can see that when the tank is in place I will not be able to get at one of the bold for the upper rear wishbone. As one isn't supposed to torque up these bolts until the car is on the ground this could be going to be a bit difficult. Perhaps I'll have to plan on taking it to bits again. What's more, as far as I can tell the fuel tank, which is a rather nice piece of welded aluminium, is going to end up un-earthed. This seems extremely odd to the electrical engineer in me. (Especially the student electrical engineer that I was that was scared shitless by the high-voltage lab at University!) I must ask Westfield about this too.
June 28th
I can see that I'm getting to the point where I'm going to have to start glass fibre hacking. So, I went out and bought a facemask. I seem to be just about allergic to the glass fibre insulation that we have in some places in our house, so I suspect the dust that comes off drilled and sawed bodywork is going to be no fun at all.
in case you've got to this frame directly and can't get out, go here.