 Sorry for the absence, I’ve been away feeling sorry for myself as I’ve had human ‘flu, at least that’s what I think it was. No wonder it’s killed so many people if it makes you feel that grotty. Excuse me while I go and make myself another “paracetamol-based cold remedy”, as they are coyly described on the NHS website.
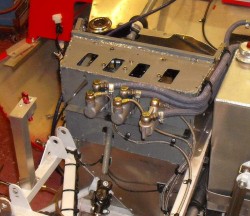
Back to the car though. You will remember that I sorted out the foot rest but I remained concerned that the pedal box was flexing a bit. I became certain about that when Adrian was round here and I got him to press hard on the pedal while I was looking at the pedal box. It was clear that the front of the box was flexing a mm or so. So, I added the lump of steel angle that you can see in the photo. Luckily this  hasn’t disturbed the hose connections very much; usefully I used flexible hose for the first bits of the hydraulic runs so that made things a bit easier.
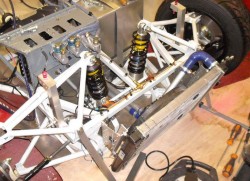
So, that’s one thing off the to-do list. And as I’d got the suspension apart slightly—as you can see there’s no rocker arm in that photo—I thought I’d do another one by fitting the springs and dampers. This turned out to be quite tricky at the front as at first the bottoms of the dampers fouled on the mounting plates. However, that was sorted using a bit of angle grinder magic and the next photo show you the front of the car with the spring units in place.
You might wonder what the yellow blobs on the springs are; they’re a code that I use to write the spring rate on the spring. They always do have the rate written on them but it’s on the top where you can’t see it when the springs are position and I do this so I can tell what’s there easily.
 Something else about that photo, you can see that the splitter is a great place to leave tools so that they fall out when the car’s on track later. I must stop doing that.
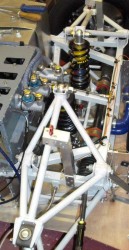
In the next photo you can see that the rocker arm is, as discussed ages ago, very close to the master cylinders. However, I reckon it’s probably OK. If not then things are flexing just too much for comfort and the chassis needs to be re-designed. I’ve often wondered about sticking a small camera inside the bodywork looking at the suspension to check on things like this. Probably quite easy to do now that video cameras have got so small. One issue about the front end of the car is how tight it all is. One issue I haven’t solved yet is how to fit a towing strap. Somehow I  have to make such a thing accessible at the front of the car for when I stuff it into a gravel trap.
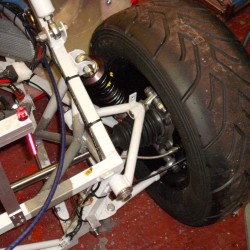
Next up was the rear suspension and that was pretty easy to add the spring units to, mainly because there’s a lot more room here.
So, with the suspension units in place that means I can now remove something else from the list. Next up, I think, will be too do the ARBs. That’ll need some machining and metal work so is going to take a bit of a while.
In the meantime, I might as well update the to-do list so you can see where I am. Now I think of it, the two ARB tasks are really the only time-consuming things there:
Pre test:
- Fit/fabricate towing straps.
- Make seat
- Insulate seat back. (I’m worried about getting the driver too hot!)
- Fabricate/fit front ARB.
- Fabricate/fit rear ARB.
- Fit carbon fibre splitter.
- Mount a camera somehow.
- Do a mega bolt check.
- Make a windscreen of some form.
- Lubricate and re-tension the chain.
- Setup the suspension. This’ll have to be a guess at first but it’s a start. One issue with this is that I think I’m going to have to modify the little gadgets that extend the track rod ends as I think they’re a smidge too long.
- Pin the lower part of the sidepods to the chassis floor. I’m not totally sure that they need it, but just to be sure…
- Adjust the bonnet pins.
- Make rear undertray
- Fit lamp covers
Pre race:
- Fabricate some sort of inlet for the airbox.
- Possibly as part of that, make a cover for the upper injectors and fuel line. As it is at the moment it’ll give a scrutineer heart failure.
- Fit roundels and race numbers. Fit other missing decals.
- Think about adding additional triangulation to the engine compartment.
- Touch up rear bodywork paint.
- Add some yellow.
- Transfer the transponder (it’s my number) from the Fury.
- Fabricate a chain guard
- Fit the catch tank.
- Get a lambda boss welded into the exhaust system. While this is being done, get the little fitting on the exhaust that I damaged re-welded.
