
 It’s getting awfully close to Rockingham now, but I think it’s going to be possible as long as I don’t strike any fundamental problems.
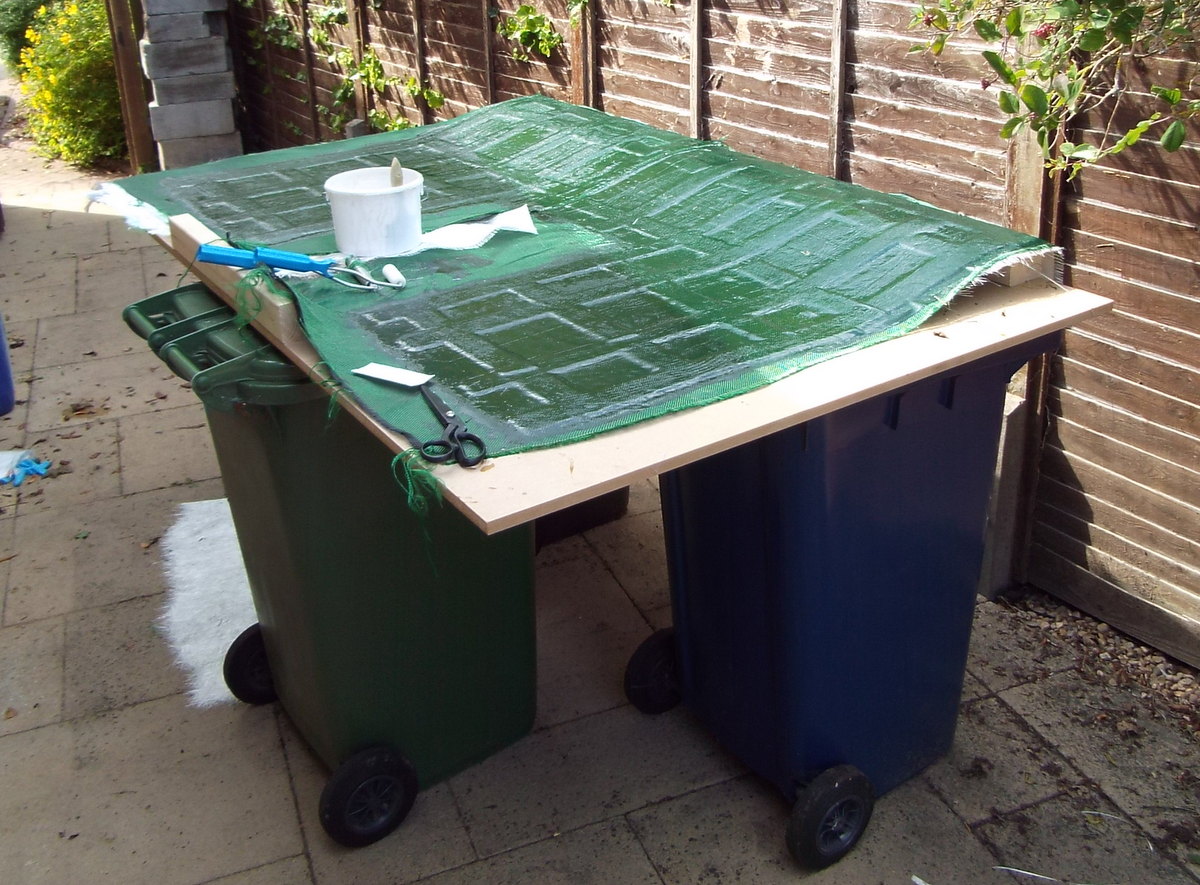
One of the things to do is to add a front and rear floor to the car. In the future, I’m doubtless going to want to be more sophisticated about this but I decided to do something simple for now. For the front floor, I haven’t sorted the rear one yet, I made a mould by bending a sheet of aluminium around some bits of wood and laid up a mixture of various bits of fabric using some polyester resin with some stiffening ribs made our of coremat embedded in the mix. Also embedded in the mix, as a consequence of the location, are 1 Red Admiral butterfly and various bits of honeysuckle.
Note the innovative use of three wheelie bins…
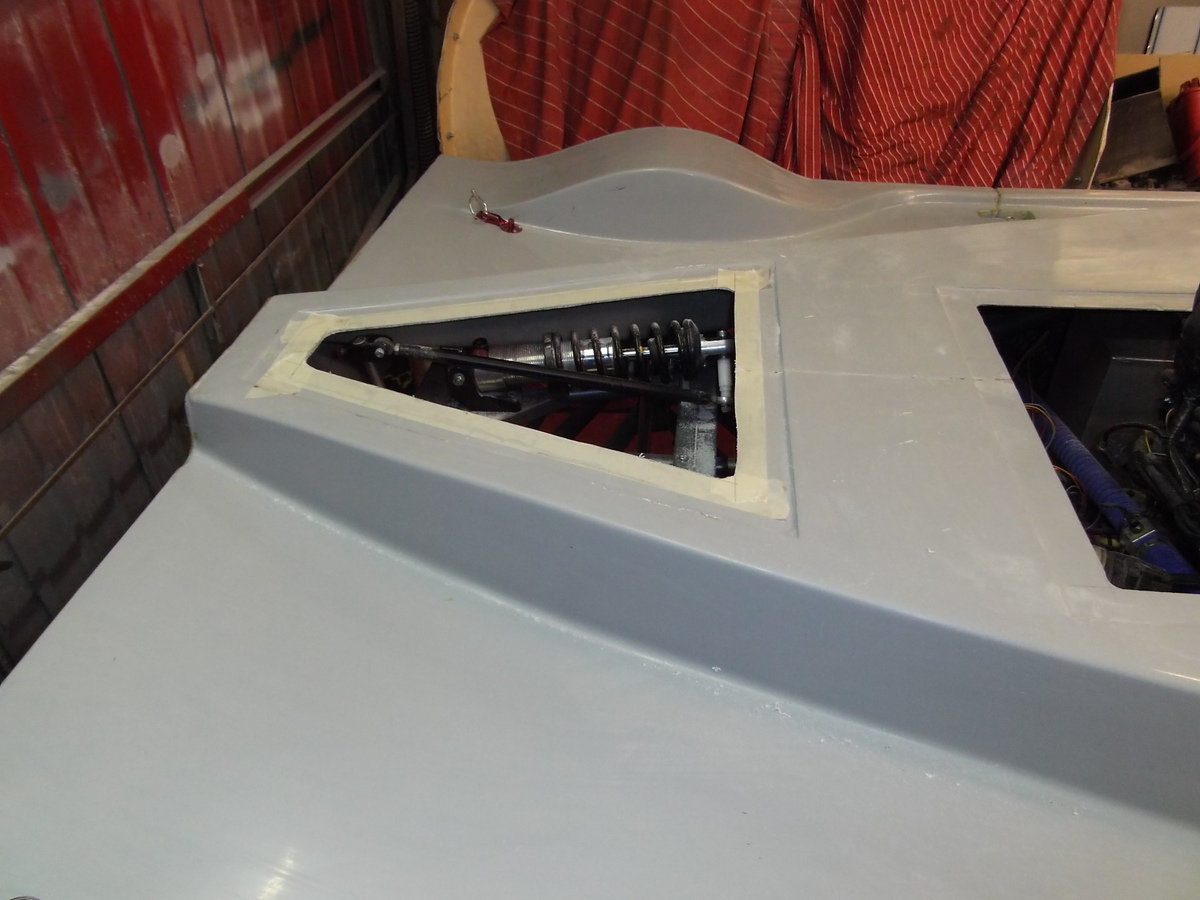 At the back of the car, I’ve cut out the access panel and made an aluminium panel to fill in the hole. It’d be nice to use a sheet of carbon but I don’t have the time.
One of the issues with this, which I was expecting, is that cutting out this panel necessitates that the strip just in front of it be toughened up as it takes a lot of load when adding and removing the bodywork. So, I laid up some more composite magic on the inside of it, hoping that it’s going to bond in properly.
You will probably remember that the back of the bodywork is just a flat panel. Again, I might well modify this at some point but, for now, I’ve trimmed it to make it a 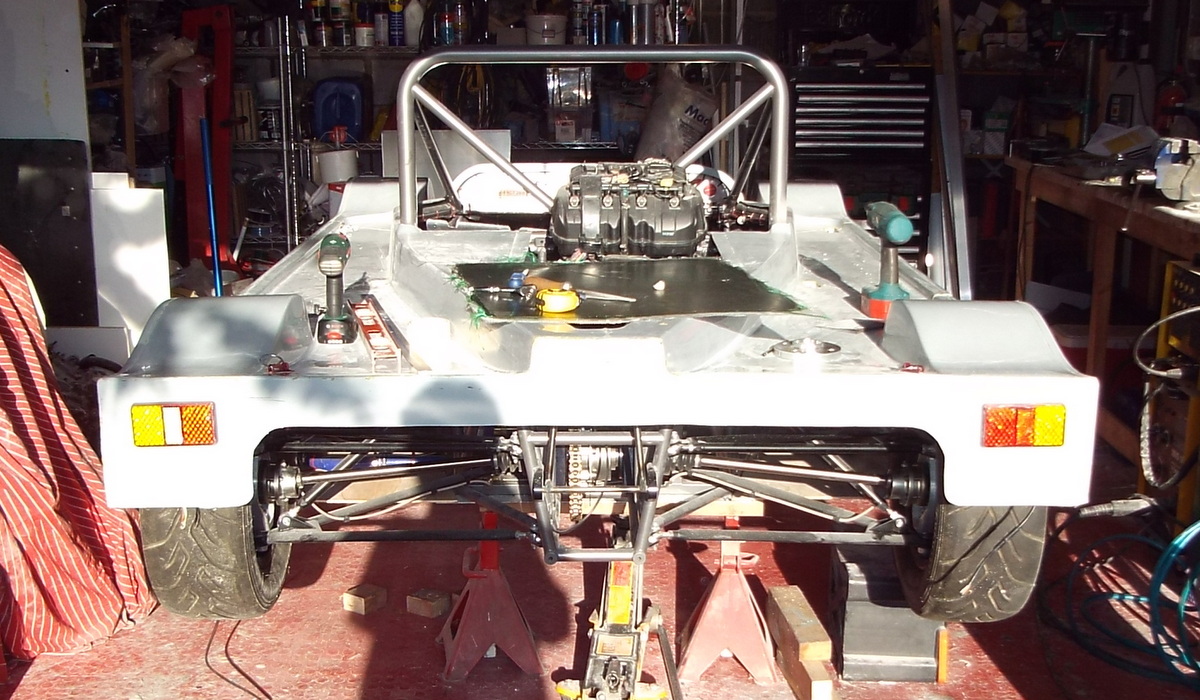 bit more attractive. It isn’t too bad to be honest.
As you can see, I’ve fitted the rear lights. I also followed the suggestion that Matt made in the comments on the last post and went out and bought an LED lamp specific flasher unit. So, the indicators do now flash nicely.
What’s more the brake and marker lights work as well!
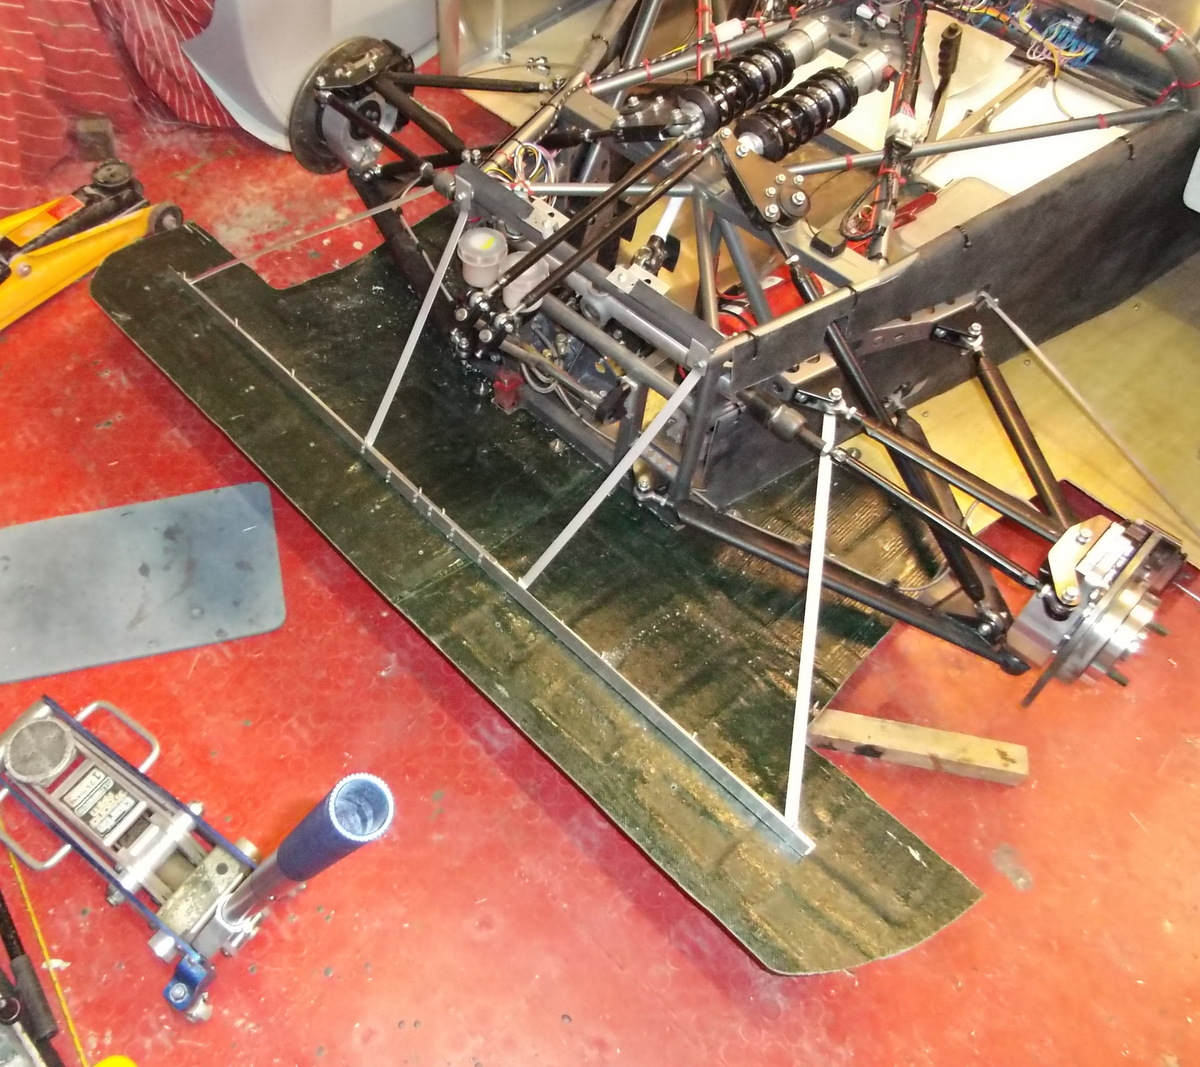
 I’ve been troubled for a while as to how to fit the exhaust, and more specifically the silencer, in. However, a trip to Andy’s one sunny Saturday yielded this as a solution. It snakes over the top of the suspension with a couple of 45° bends.
That’s a nice solution and I’ve now arranged a support bracket to hold up the centre of the silencer and also replaced the sidepod support diagonal that we had to move to fit the silencer in.
The one problem is that I left my cat at Andy’s, I’ll need to retrieve it and weld it back on the tail pipe.
 I trimmed the front floor to some sort of shape and mounted it on the front of the chassis with various bits of aluminium to support it. To be honest, I might replace these with some bits of studding so as to add a bit of adjustability. That needs me to spend a while hunched over the lathe though and I’m trying to avoid such things.
I spent some time playing around with how to mount the front lights, and ended up with what’s in the next photo. The biggest problem is that the compact nature of the bodywork 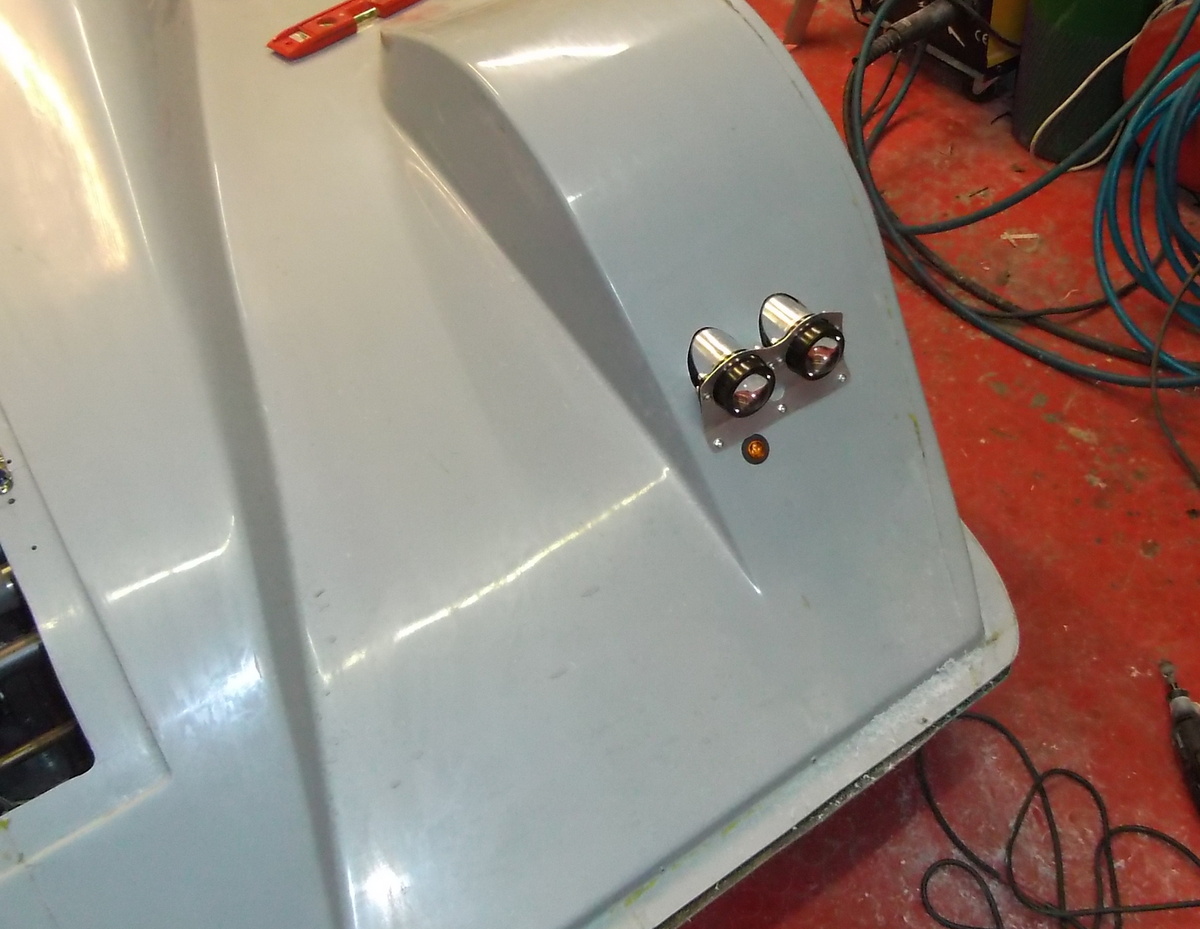 means that it’s tricky making the lights miss the front tyres. This arrangement is pretty minimal but I think I could move the lights forward if needed. The plan is to eventually make a transparent blister to go over these. For now, though, this will do fine. The indicator is actually a corner marker for something like a truck. It seems to work fine as an indicator though.
If you look really hard in the photo you can see the floor peeping out at the front of the bodywork. I’ve actually now pinned the bodywork and floor together with a rather simplistic bonnet pin at the corner of the bodywork. It’s not pretty but it works nicely.
Once I’d got all the lighting mounted I finished off the wiring so all of the wiring in the car is now complete and you can turn the 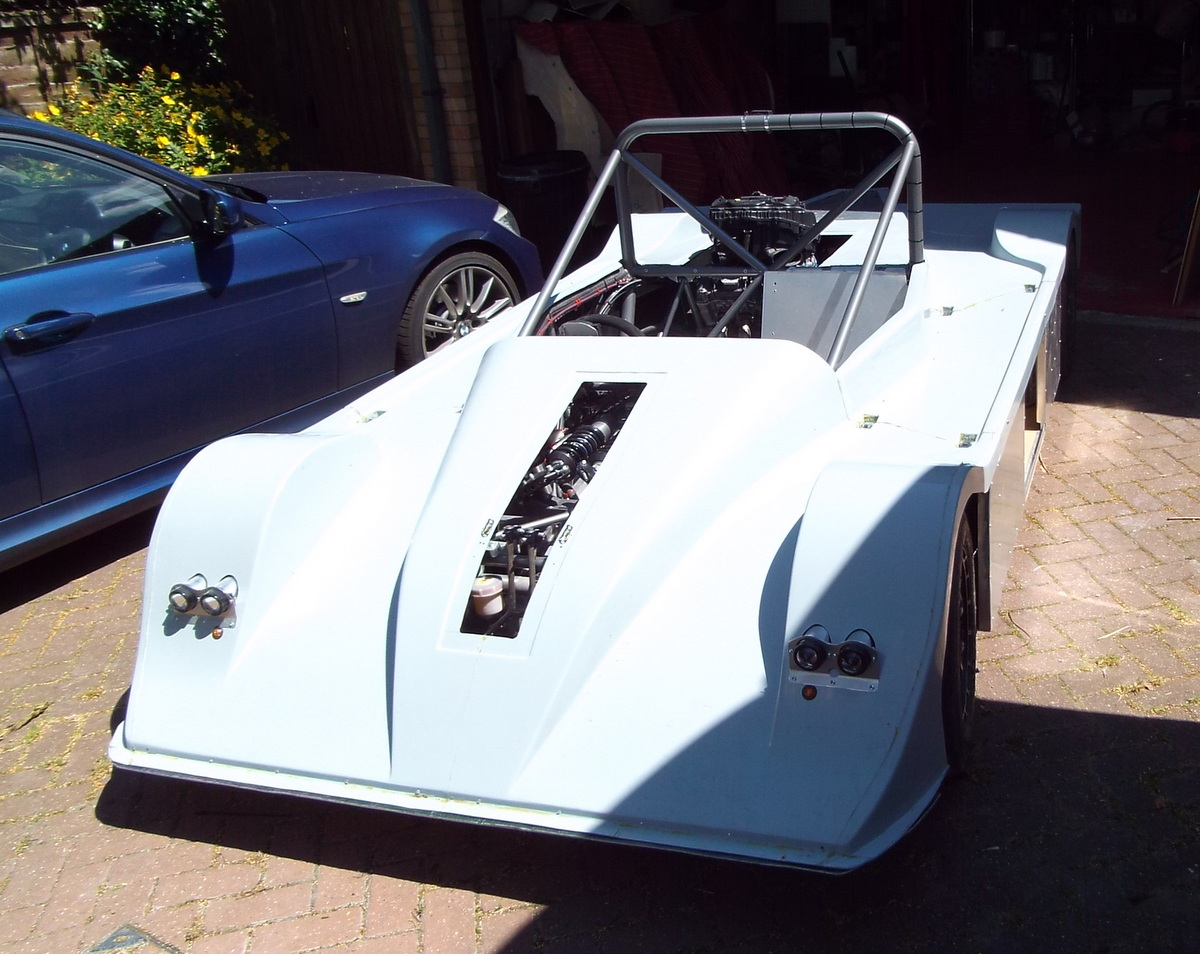 lights on and indicate that you’re going into the pits. Of course, I’ll never actually do this but that’s the RGB game… The car is now getting to the point where it mostly looks like a car and to celebrate I pushed it out onto the drive in rather brilliant sunshine. Here’s one of the photos that I took which is all a bit washed out because of the sun. All the same, it looks like a car.
With it on the drive I took the opportunity to run the engine up to temperature and rev it a bit. (Apologies to the neighbours!) The engine didn’t expire in a cloud of conrods so I guess that’s good.
Back in the garage I spent a goodly time making a seat in the usual expanding foam/wheelie bin bag manner. I had been wondering about trying one of the ball and 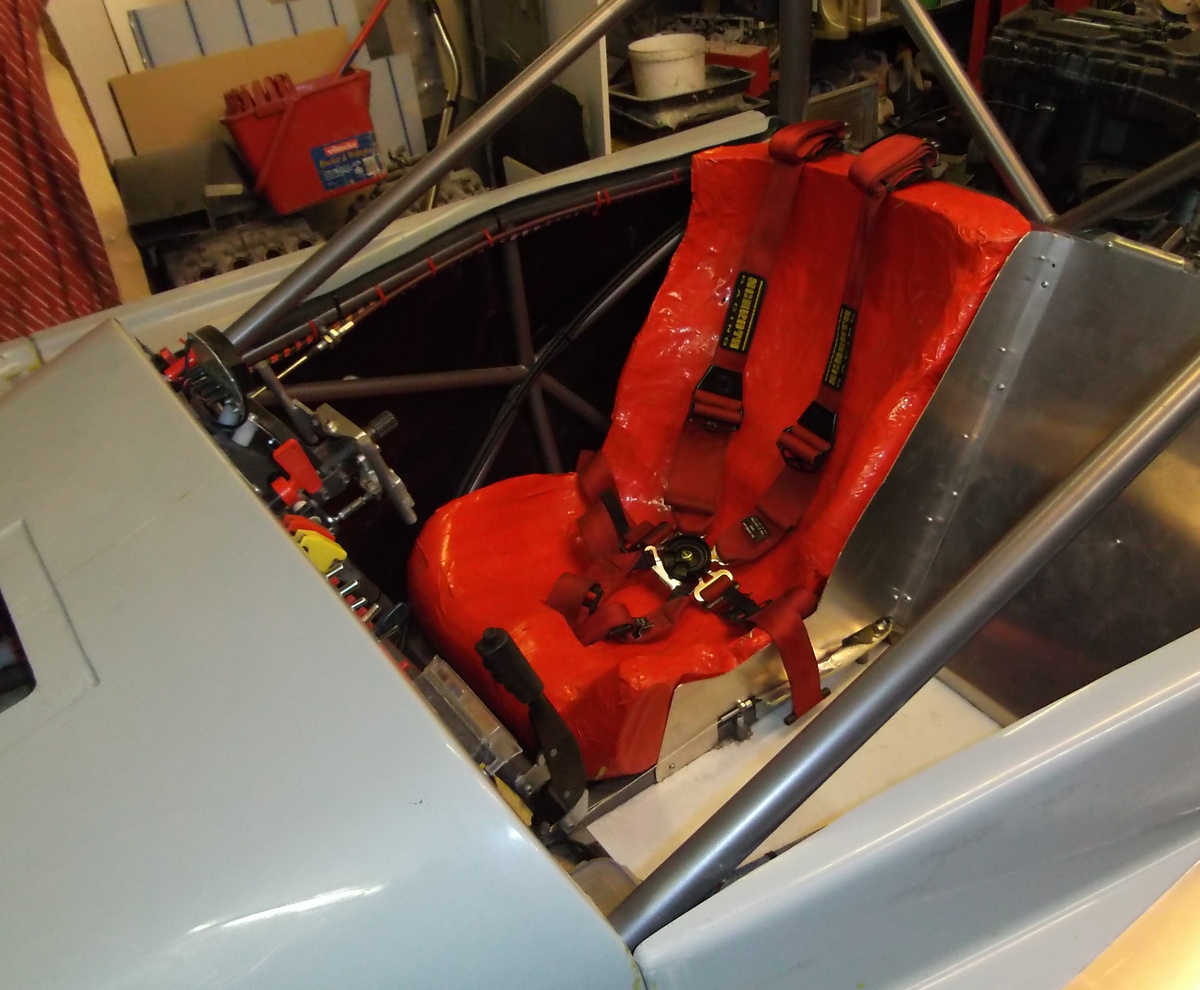 vacuum seats but decided to stick with what I knew. I was thinking about the first time I made such a seat; I ended up with a huge pile of discarded bits of foam round the back of the house. This time the only casualty was a tee shirt when the bag leaked a bit. This seat is the first one I made and it was all a much more leisurely process than that first rather fraught occasion.
Those are the old J15 belts in the seat. I must admit that I’m considering buying some shiny new ones…
I am more than impressed!
Neil