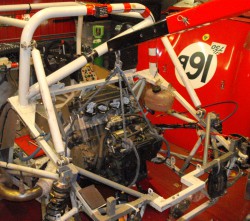
 So, I took the engine out, intending to get to the bottom of the oil pressure issue. I’m getting reasonably good at taking the engine out of this car, but as usual you always end up with a quantity of fluids falling out and making a real mess of the floor.
That engine hoist is one of the most useful things I ever bought. Back when I started this kit car malarkey I hired a hoist to put the engine in the original Westfield that I bought. If I’d hired a hoist on every occasion that I’ve used one I’d have  to have sold a corner of the house to pay for it. I use it quite a lot for just lifting the car up onto stands, that is not just for moving an engine. Of course, a bike engine is quite light anyway, but it’s a little bit too heavy for one person to easily lift it in and out of the chassis.
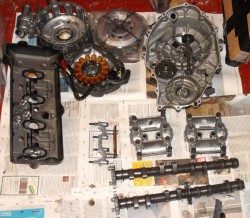
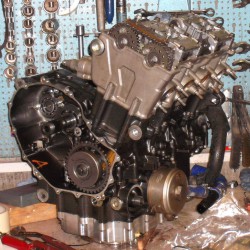
So, having put the engine on the bench I’ve started taking it to pieces. There’s lots and lots of them. As you can see, I’ve taken the cams off. I thought that while I was looking at the bottom end, I might as well check the top end as well. (And, Andy reckoned that I ought to look for signs of oil starvation in and around the cam followers.) I’m actually trying to avoid taking the head off. For one reason there’s a couple of expensive gaskets that I’d have to replace, and some expensive stretch bolts to buy.
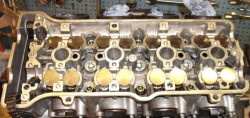
The top end turned out to be in what looks like good condition. It even looks shiny in the photo! I’ve measured all the current valve shim thicknesses (it  is written on them but is fantastically difficult to see) and now I’ve measured the valve clearances. I need to adjust a couple of them but all the rest of them are within tolerance. Of course, this means I need to buy some of the world’s most expensive shims.
Next thing is to get at the bottom end of the engine. I’m hoping that if I remove the cam drive chain, which I’ve currently reinstated so that I can turn the engine over to measure the valve clearances, but leave the head and cam cover in place, that I’ll be able to split the  crankcase, and therefore get at the mains and big ends, without having to take the head off. This isn’t strictly what it says in the manual but as it’s rather deficient on other topics then perhaps it’s OK to bodge things around a bit. The manual, and I’m using the kosher Honda manual, doesn’t tell you, for example, which way round to fit the cams. They’re located by two bolts in the drive sprockets, you can see them in the photo, but there’s no reason why you shouldn’t fit the cam 180° around from where it should be. This is OK if you get both cams like that but getting one of the them out of phase with the other would be seriously bad news. Luckily the Haynes manual I’ve got for the ’07 engine tells you this vital bit of information. Perhaps the Honda manual just assumes that you’ll be awake enough to check what phase the cam lobes are in, and what makes sense for which stroke you think the engine’s on…
So, next trip into the garage will replace the cam cover and start taking the bottom end off. One thing I did do, when I drained the oil, was to filter it all looking for any bits. (“Panning for gold”, as Andy describes it.) Everything looked fine then, but there’s always a chance that the sump is full of bits that didn’t make it out of the drain hole…
