
 Hard to think of neat names for a post when I’ve just been continuing to do small bits and pieces.
Here’s an idea of the sort of structure that I want to build inside the sidepods to try and use the air a little more effectively. Probably won’t use paper though, more carbon seems a sensible idea.
 Scroll forward a few weeks (this post is anything but chronological) and this came into existence. As you can tell, it’s held together with Clekos and tape at the moment but it’s on the way. Mind you, just after taking this photo I decided that the shape was all wrong and remade it… Good job that the Clekos were there.
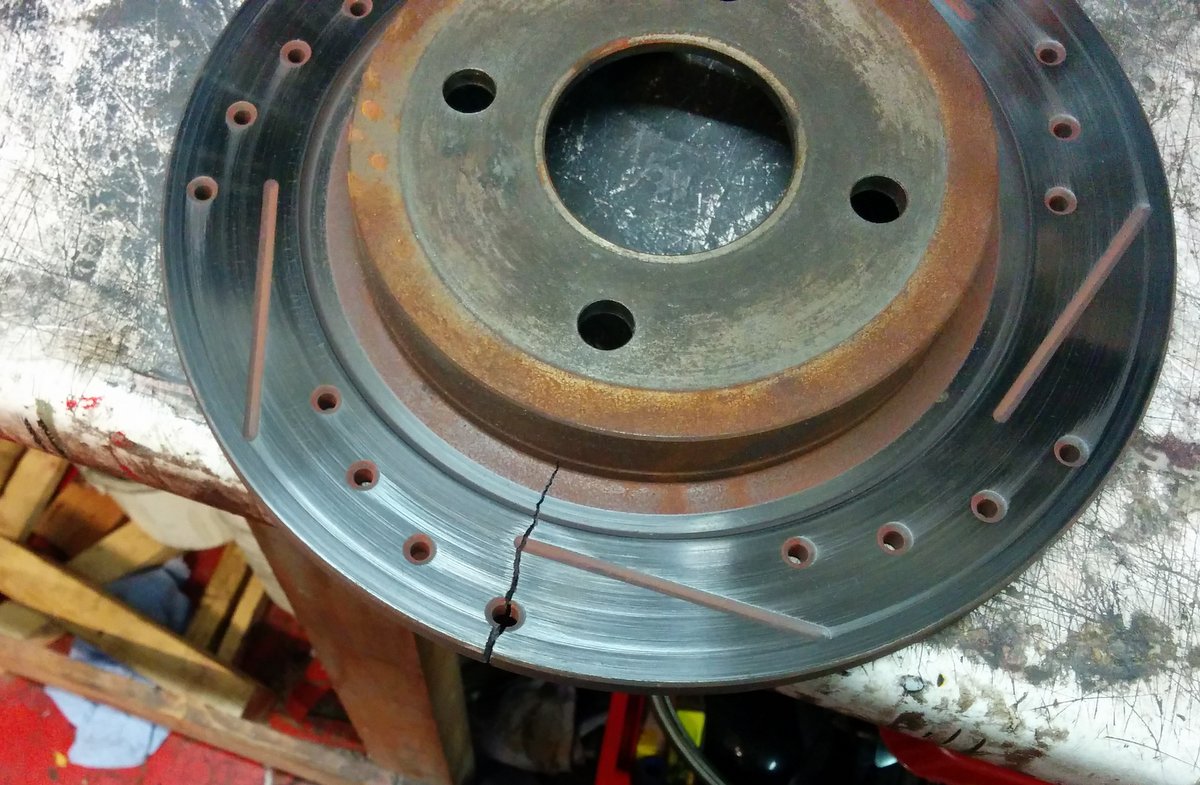 As well as making snazzy new bits though I’m also taking the car to bits and checking things. In the process of putting the front suspension back together I discovered that one of the brake discs had a socking great crack in it. It’s easy enough to replace but not really very convincing. If there’s anything about the basic Sabre design that I detest it’s the design of the uprights. They’re such that you’re forced to use discs like these rather than those I’d prefer (vented, floating, aluminium bell) in order to have a chance of missing the wheel. One day or another I’m going to completely redesign the suspension. It’s already rather different from standard and that would completely break with the past.
 Back in the here and now, though, here’s the battery in its new position. You’ll notice that when I took the photo I don’t seem to have quite finished the wiring though. This is tucked down the side of the cooling ducting and will, of course, be a bugger to change if I have to. Hopefully, it’ll fix the problem discussed earlier.
 The other update here, and another item on the todo list, is to add in a remote pull for the master switch. In this case the master switch in now just above the battery. (Hopefully the very occasional passenger will treat it with respect!) This meant that I could add in a panel near the approved location in the Blue Book for a pull for both the master switch and the extinguisher.
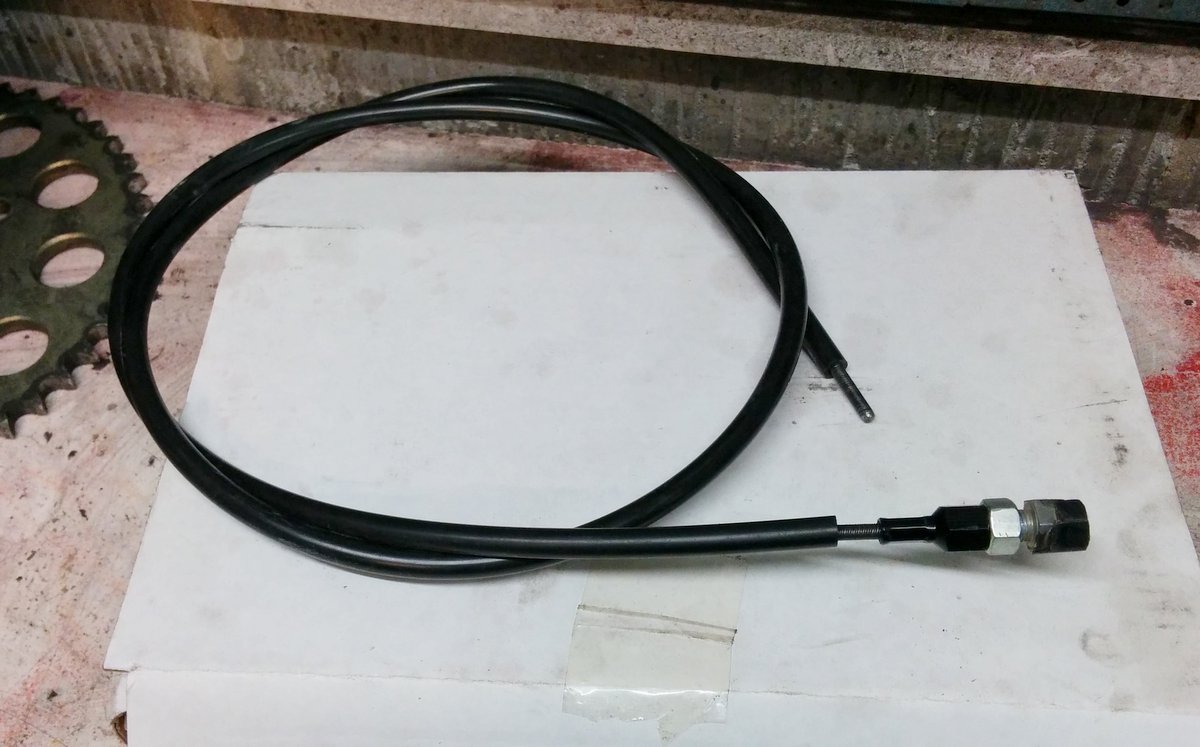
  Have to be really careful to pull the right one, of course, but the BB does say they should be next to each other. You’ll notice that the panel here is, inevitably, yet more carbon. After all, why wouldn’t you? There’s quite a long cable that snakes around the front of the car and comes back to the master switch, as in the second photo here. Note the innovative cable outer clamp used here. I should emphasise, though, it works really well. At least it does now before the cable gets all nadgered.
 Now, if you trawl back through this site, such as here, you’ll remember that the brake bias adjuster used to be on this panel that’s magically transformed into carbon. On the list, again, you’ll see that I want to modify the brake bias adjuster and I’ve done so.
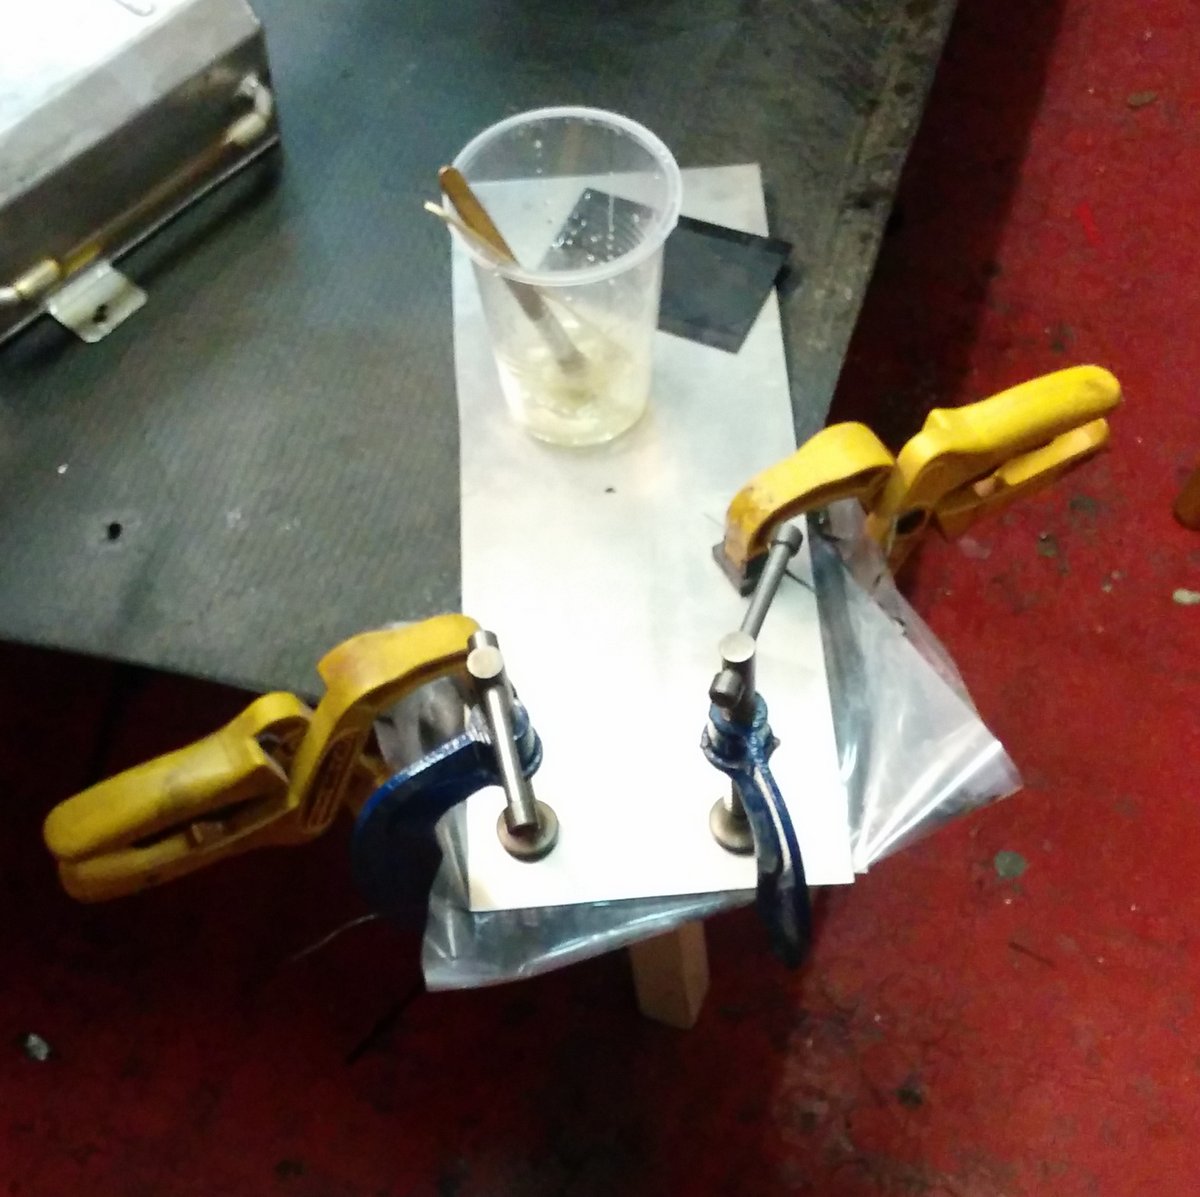
A while ago I bought a Wilwood brake bias adjuster, intending to fit it immediately as the one I was using (which appears in that old post) didn’t really work that well. However, I didn’t fit the new adjuster because it didn’t directly connect to my brake bias shaft in the pedal box; the adjuster assumed a 3/8″ UNF thread and the shaft is 7/16″ UNF. Isn’t it so much easier now the world’s metric?
I’ve now resolved this by welding up the little adapter in the photo above where it appears attached to the Wilwood adjuster cable. The adapter is  basically a 3/8″ bolt welded to a 7/16″ nut. (There’s a locknut in the photo too.)
I was still without anywhere to put the adjuster knob and that was resolved by changing the rest of the dash to a carbon panel. (There’s a theme here!) The new dash appears in the next photo. The big advantage of doing this is that I could fix a problem in that the warning light for the indicators didn’t (warn, that is) and there were  a lot of unused holes in the old dash caused by a change to the data logger in use. It looks a bit sparser now which is nice.
I’ve now moved onto repairing the bodywork. First issue was the rear corner of the floor. This looked like the next photo after I’d been Civiced at the Birkett. That doesn’t look too bad but the cracking in the carbon goes rather further than it looks in the photo.
 Like I did a while ago, I’ve used some of the Easy Composites repair resin to craft an in-situ repair here. This used a “mould” made with release film, aluminium and G cramps as in the next photo.
This was left overnight and right now it looks like the next photo. Obviously, it needs trimming but it’s going to be  perfectly usable. It’s actually very slightly more flexible than the rest of the floor as the repair was made with just carbon rather than using the core material that’s in the rest of the floor.
Next up, I want to fix the side panel. There’s actually two problems  here. The back of the panel has been torn off and I’m intending to sort that by putting it back into the mould. However, there’s also a crack all down the side of it which I’ve patched up using the release film technique. I used some ready woven carbon strip for this and I’ve realised that I shouldn’t have done so. It’s clearly woven on a needle loom (something I know about for complicated reasons) and the selvedge
  has left a rather pronounced lump at the side of the repair that I’m going to have to sand down. However, it’s not going to fall apart which was possible beforehand.