Mould manouevres

Mould preparationI’m getting so bad at writing this blog that it’s getting annoying. I do write the occasional facebook post that ends up in the RGB group but that isn’t enough really. Worst of all, I have to read back and remember where I’d got to. The answer is usually that it wasn’t that different from now really…

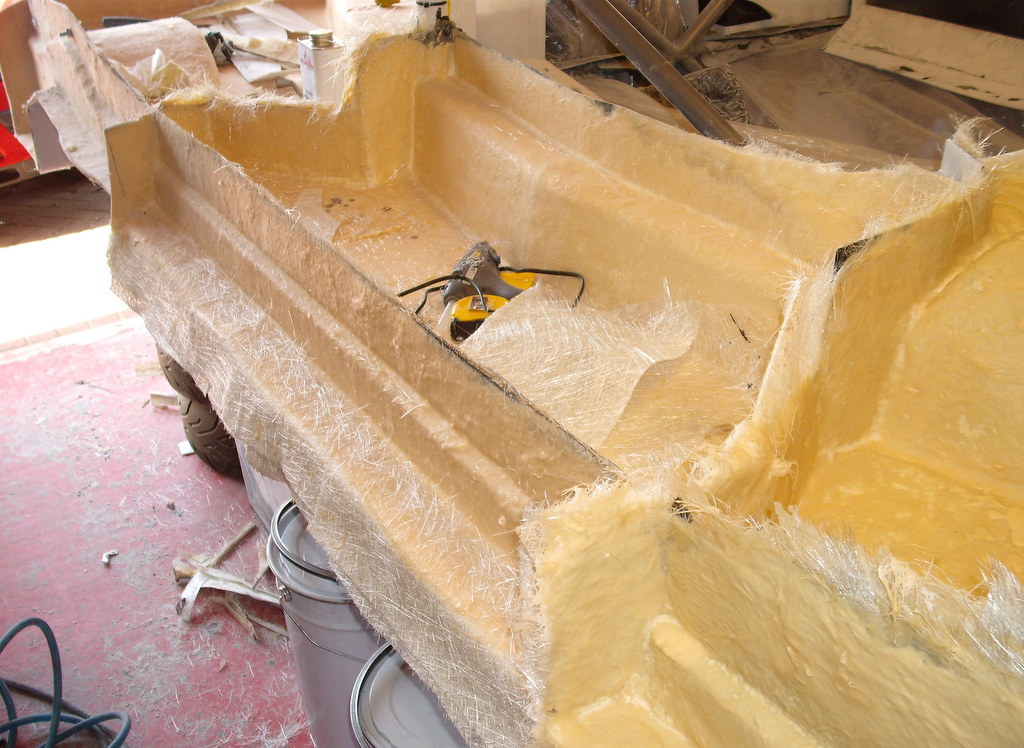
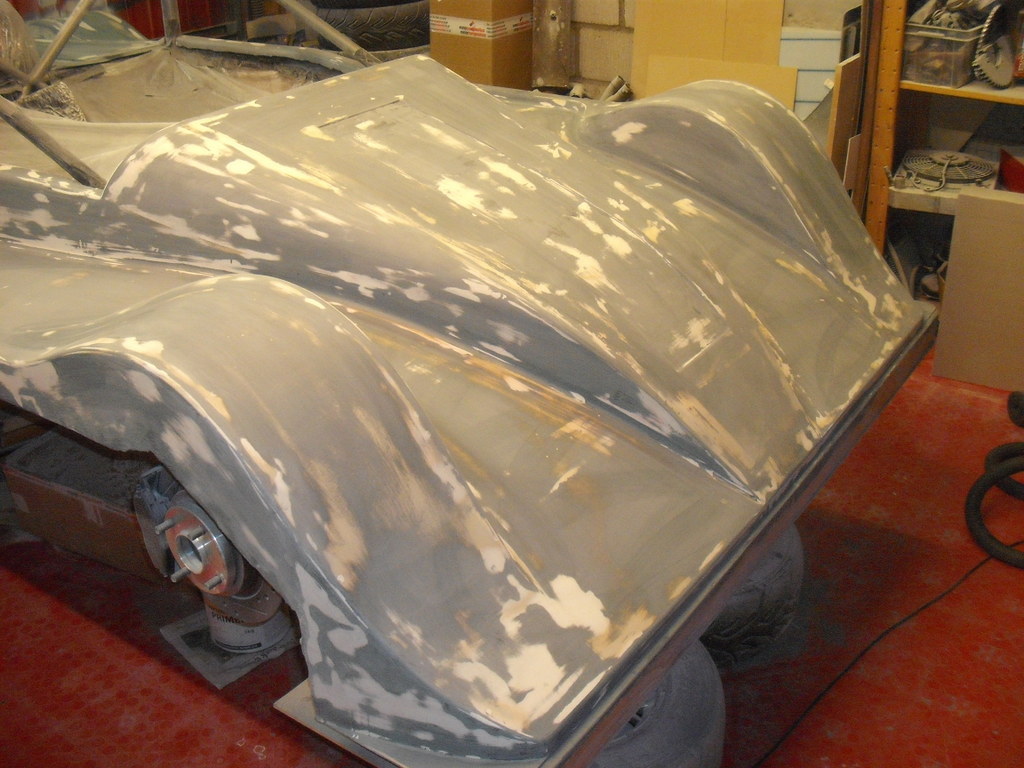
All the same there is real progress to talk about this time. Last time, you will remember, I’d removed the moulds and ceremonially broken up the buck. The buck is in fact still sitting at the side of the house ready to be dumped into a skip that we’re hiring soon.

Continue reading “Mould manouevres”

Buck breaking work

Lots of mouldsTo cut a long story short, I finished making all the moulds. It’s really not a pleasant job and I can see why the general consensus is that you get someone else to do it for you. You just spend forever putting more and more resin and matting in place, with the corollary in my case that the whole house stinks of resin.

Continue reading “Buck breaking work”

Not breaking the mould

FencesYou left us with me girding my loins to start mould making. I’m deep in the middle of this now, so really this is just a bunch of photo showing you where I’m up to.

The process we’re following is straight off the easy-composites lists:

  1. Assuming that the buck is done, ours has been declared to be finished by the authorities
  2. Clean the buck with mould cleaner, which smells suspiciously like a combination of brake cleaner and panel wipe.
  3. Apply four coats of Easy-lease chemical release agent
  4. Apply two coats of wax for good measure.
  5. Stick in a load of mould fences and discover that you can’t get them to stick to the mould-released surface. Sky hooks have to be used instead.
  6. Seal up all the gaps with prodigious quantities of filleting wax. (See the picture on the right, the yellow stuff is the wax.)
  7. Slop gel into mould and wait an age for it to go off. This is a vinyl ester product, as we want it to be impervious to epoxy which means:
  8. Apply a single layer of coupling coat resin and 150gsm CSM.
  9. Remove glass inserts from skin
  10. Apply four layers of mould resin and 450gsm CSM.
  11. Watch the colour of the mould change to white. Odd that.

Continue reading “Not breaking the mould”

Compounding interest

Compounded-010So, with the buck sort of OK after the alarums with the gloss coat I did a bit of patching up of the worst of the excesses of rubbing down the gloss. That left me with a buck that needed polishing up, using compounding gloop, before making the moulds. I did experiment with doing it by hand but decided I’d still be here next Christmas so I went to those nice chaps at Machine Mart and bought a compounder/polisher. Continue reading “Compounding interest”

Glossing over the problems

So, with it now green and all nice and smooth as a baby’s bum, we decided that it was about time to add the gloss coat. This is the Easy Composites substitute for the more traditional painting of the buck. In any case, the best paint to use is 2-pack and neither Adrian nor I fancied the health risks that that brought with is, or the necessity of breathing air supplied by another compressor. (Breathing in dust is bad enough but breathing in what amounts to fine glue is altogether a different issue.)

The gloss coat is just another MEKP-catalysed 2-part gloop. This time it’s transparent and is, supposedly, thixotropic so that it doesn’t flow downhill with too much alacrity and self-levelling so you retain the nice finish on the buck. Continue reading “Glossing over the problems”

Going green

Rubbed down again-004Yet another quick update! As promised at the end of the last update we promptly wrecked the nice finish and rubbed it all down again. It really was “we”; at one point there were three of us all working away with nary a word between us on account of us all wearing breathing masks. This particular reprobate is Adrian who seems inordinately pleased at the carnage that he’s wreaked.

Continue reading “Going green”

Back to Black

SubstructureOK, I’m back again after a couple of months seemingly covered in dust and generally making a quite spectacular mess. A word of thanks is  due to my spectacularly wonderful wife for putting up with the mess. Mind you, whenever I talk about slowing down a bit Anthea’s the first to complain. So, it’s still grindstone time for me.

Continue reading “Back to Black”

Long time no see

sabre dash panel-004So, you might well wonder where I’ve been. The answer is, beavering away but not finding the time to talk about it due to all the other non-car work that’s going on. So, this is kind of a catch up post where I’ll probably spend too little time really telling you all the stuff that you’re desperate to know about.

Continue reading “Long time no see”

New season coming rushing up

Fullscreen-capture-12022013-231258Finally,  I seem to be making a bit of progress on the car. Mind you, precious little of this progress has translated to this website. I have, though, been doing stuff on two other sites. The new 750 website was produced with a good deal of help from me and I’ve also been putting together a new site for RGB to go with the existing forum. Note that even if you’re not an RGBer you can now invest in some RGB teamwear to make you feel more a part of the action. Perhaps, though, the RGB umbrellas will be a better choice if we have the same sort of summer as we had last year.

Continue reading “New season coming rushing up”