 I've not done anything for a few days, as work's been so busy. However, stuff has continued
to arrive and I want to try and spend a bit of a while at the weekend getting on with some of the "inside"
things.
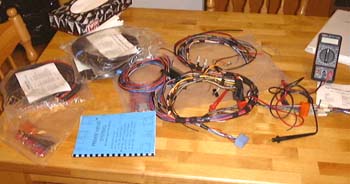
I got the wiring loom a while ago from Premier, and it looks pretty good. However, I need to spend a while sorting out which bit is which. This is made rather difficult for me as I'm colour blind and working out what is precisely meant by "slate/blue", for example, can be tricky. Luckily the rest of family is not afflicted the same way and is used to helping me out in situations like this.
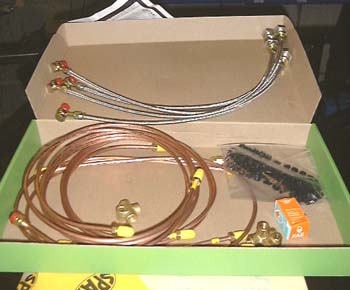 I've also been looking at the brake pipes. They're a rather nice kit of carefully labelled
copper pipes. As long as everything is long enough to fit it should work rather well.
These pipes are rather different from the ones that were on the Westfield. Those were steel and were pre-installed in the chassis. They were very difficult to bend whereas these are quite malleable.
I've been musing, again, about what carburetter to get for the engine. There seem to be three choices:
- The Holley 390cfm job. This is rather favourite it seems of many people but others say it is rather difficult to set up, and I remember Peter Baldwin saying much the same at the Westfield rolling road session.
- The Weber 500. This appears extensively on the spectacularly disorganised RPI web pages.
- The Edelbrock Performer 500cfm. I believe this is essentially the same as the Weber 500, albeit with some differences in the areas of the levers on the outside of the carb.
Needless to say there are large differences in the prices of things like this. The RPI price for the carb, manifold, etc amounts to about £560 whereas the price from my friends at Real Steel for the Edelbrock comes to about £440, with the Holley being a bit less still. (At least these are the prices in my current catalogue. These could well be wrong now as Real Steel source a lot of stuff direct from the US, meaning that their prices tend to fluctuate depending on the pound/dollar rate.
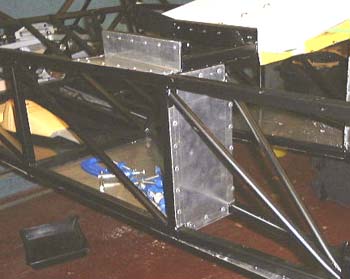 In preparation for starting work on the brake lines proper, I added the aluminium
panels on the driver's side of the battery shelf and the driver's footwell. There is a real confusion here about
the order of things, in that the brake pipes have to be threaded through the same space that is used by the steering
column and is very tight against one of the the engine's exhaust manifolds.
I installed the front tee piece, using a rivnut for neatness, and installed the pipe that goes from the appropriate (there are two on the Rush) master cylinder to the tee piece. Just for now, I will leave the end of the brake pipe loose, until I find out where the pedals are going to go.
I then checked the routing for the rear cylinder/tee piece pipe using a piece of string. The supplied pipes do indeed appear to be the right length. The rear tee piece was installed and I started bending the pipe to fit.
Fitting these pipes is really slow work, as I'm trying to do it as neatly as possible.
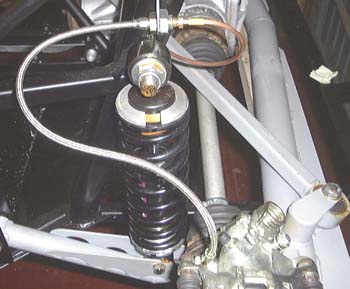 I got the brakes installed completely, apart from the connection to the pedal box, which
will have to wait until the pedals are mounted in their final position, and the the front left pipe, which will
have to wait as I've run out of pipe clips.
I ran the rear pipe up one of the diagonal chassis tubes that goes from the area of the gearbox mounting to just above the diff. This seems to allow a reasonably neat installation while being short enough for the pipes to fit.
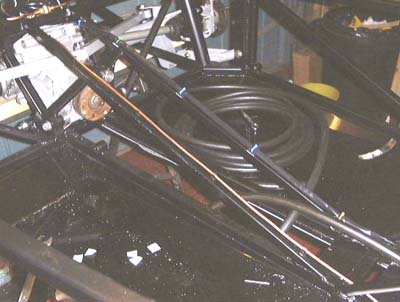 The next "inside" thing is the wiring loom. The Premier loom comes
in several bits:
- the main component with things like the fuse box that connects to the switches,
- the loom for the rear of the car which connects to the lights and so on,
- the loom to the front with more light connections,
- some separate wiring for the engine itself, which isn't very much in my case and
- instrument wiring.
I started to mount the rear extension, which now runs up the other diagonal chassis tube. The problem is, I don't have much idea yet of what the wiring is going to be like under the scuttle (or even a very clear idea of where the scuttle will be!) so I just left the front end neatly tied up for now.
Finally I started to install the fuel pipe that goes fro the pump at the rear of the car to the front. (You can see the pipe in the photo here.) I had bought some plastic coated P clips for attaching this, but they seemed rather clumsy as the attachment is to the side of the pipe itself. So, I rivetted some tie-wrap bases to the chassis which provided a neater solution. The big problem with the pipe is where it goes. At the engine end I don't really know where I'll want it to go as I don't know what the carb is going to be like (see earlier). Even worse although I have the fuel pump I don't have a clue where to mount it as the manual is completely absent on the subject. I'm sure I'll be able to figure something out though.
I've spent a little bit of time the last few days making sure that I understand everything in the loom, and labelling all the wires with writing. (Rather than the colours which aren't very helpful, as mentioned before.) I now know what everything does and will be in a position to try installing it in the car at the weekend. If I get this and the petrol pipes done then I'll have all of the "front to back" things done.
I'm rather pleased with the loom, which seems a nice piece of work. The fittings are indeed all set up for the Sierra steering column, but I will try and get the proper connectors for it. If I can't manage to get them I will have to find some individual ones that work, or just solder straight to the connection pins on the column.
One thing I do need to do is to find some relays. Specifically, I need two normal on/off relays, a wiper intermittent one and a flasher unit. Perhaps I can raid these from a scrapyard too?
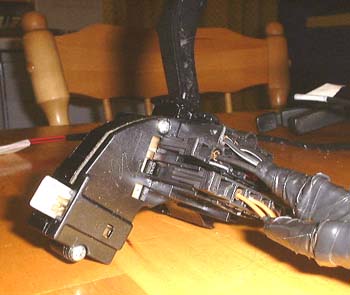 I went to the local scrapyard and managed to get some Sierra column connectors
and some relays. I couldn't find a flasher unit in any of the relay boxes I looked in though, perhaps the Sierras
have them in some odd place and I need to buy a real one?
I couldn't actually find an early Sierra, the sort that produced the column I've got, but as far as I could see the connectors looked the same and having got them home they did seem to be correct. So, I wired them into the loom and tried to test it all so that it actually reponded to the column switches in the correct manner.
This went mostly OK until at one point I lost leave of my senses. The indicators worked, but the connection was a bit dodgy. As I couldn't find a can of switch cleaner I squirted some carb cleaner in the switch. This is, I think, roughly the same sort of stuff except that it does not include the lubricant that's in switch cleaner. Anyway, what it seemed to do was to remove all the lubrication and although the switch worked actually better than before, it was rather stiff. I've tried to lubricate it again and things have improved but not wonderfully. I have been wondering if the switches off a Mark II Sierra would fit the column as they are actually rather nicer in appearance. Still, I'll put up with it for now.
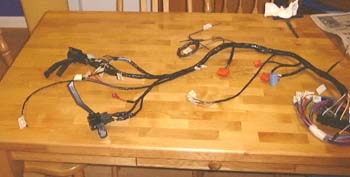 Anyway, after that it all worked and I finished off this bit of the loom by
wrapping it up in the non-sticky sort of loom tape so that it was rather neater. The only problem now is that I've
got to work out where to put it on the car which is proving rather difficult, I think because I'm having trouble
visualising it with the scuttle in position. As this effective defines the boundary between the engine and passenger
compartments it's quite important for things like wiring runs. I think I probably need to acquire some of the bits
that I'm missing at the moment, such as the instruments, before I can visualise everything properly.
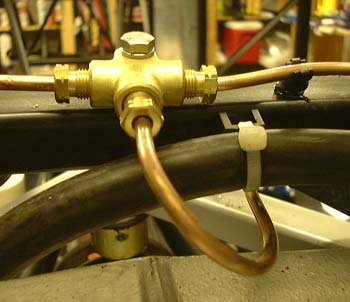 Having largely finished pratting about with the loom, I got back to the car
and put some more fuel hose in. One issue is that the location of the fuel pump is completely ignored in the manual.
I think I've found a place for it, attached to a horizontal bit of chassis just behind the driver. I need to get
some small rubber bushes to mount it on though.
All the same I threaded the pipe through until it was just at the right place. Curiously, at one point I ended up threading the pipe through the bend in a brake pipe in a manner that's very reminiscent of something at the back end of the Westfield...
There wasn't very much time this evening, but as there's a possibility that Alex can get some other stuff grit blasted I degreased the old engine mountings and a couple of other bits. I've realised that there are some other bits as well, so I'll try and get those cleaned up too...
I had an extremely useful email from Ian Crocker of SEiGHT web site fame concerning carburettors and inlet manifolds. He is essentially of the Holley school, knowing someone who has had terrible trouble getting a Weber 500 set up right. (This also tallies with the information on Dave Ellis's web site.) He also had a useful formula for telling you the required flow rate of a carb. This says that the flow rate of the carb in cfm (cubic feet per minute, a nice SI unit) is cid*rpm/3456 where cid is the displacement in cubic inchs. For a 3.5 engine (215 cubic inchs) this gives a required rate that says that the Holley 390 is a OK. Certainly people like Real Steel clearly sell a lot of these devices. The one problem, according to Ian and which I've read about elsewhere, is that the positions of the float chambers causes problems when cornering. There are other Holley devices, in particular the "double pumper" ones that have centre hung floats that avoid these problems.
All in all, I think I'm getting pushed towards the Holley at the moment. I'll give the chaps at Real Steel a ring and ask them later this week.
I phoned up Real Steel and had a chat about induction things. They said that the Edelbrock carb is indeed the same as the Weber 500, and recommended the Edelbrock manifold, as opposed to the Offenhauser one. The latter is lower but not as well designed, apparently. This fits with what other people have told me, but the lowness remains an attraction.
The chap there didn't really want to be drawn on the Holley vs Edelbrock issue, but did comment that many many people were using the Holley. He did admit, though, that the side-hung fuel bowl was an issue. I'm actually not sure where the Edelbrock is on this point. However, I think I'll go along and have a look. Unfortunately, they haven't got the Edelbrock manifolds in until next weekend so there isn't much point going until then.
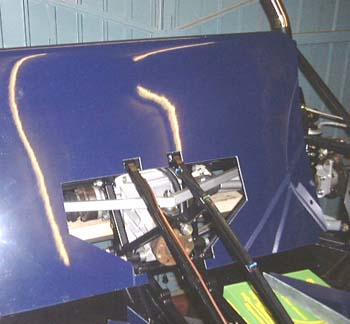 Meanwhile, back in the garage, I managed to actually do a few minor things.
One thing that's coming up is fitting the GRP panels that go in the rear corners of the car. These are reputed
to be really difficult to fit, so I have a trial fitting of various things. It certainly looks as though it will
be quite tricky to fit them, but not the end of the world. As I learnt with the Westfield the secret with fitting
GRP things is to take it slowly, and drill large holes without pilot holes. (If you use a pilot hole the flutes
on larger drill sizes catch and drag the whole (large) drill in quickly.
In order to try the fitting I unpacked the back rest panel from its polythene coffin. It certainly looks like a high quality bit of plastic, which is nice. One thing that will become an issue when fitting this is headrests. If I decide to go for the Dax squab seats (as in this photo) then I want to make some head restraints. I really don't like the sight of heads flopping about without them. Of course, if I fit seats such as the ones in the Westfield then it isn't such an issue. I will have to fit head restraints by making some stout steel brackets and fixing them to the rear top chassis rail, near or perhaps on, the seatbelt mountings.
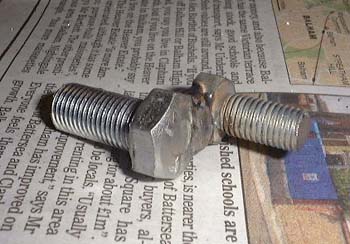 In order to avoid having to hack some GRP, I thought I'd fit the handbrake instead. On
the Rush this is mounted beneath the steering wheel, as on a Caterham. It's a standard Sierra (I think) lever which
is mounted using the curious gadget shown here, welded up by Dax. Stupidly, they use bolts that are too long so
they have to be cut down anyway.
It was pretty easy to attach the lever and the front bit of the cable, which loops around to under the gearbox mounting and attached to a bracket pre-welded to the chassis.
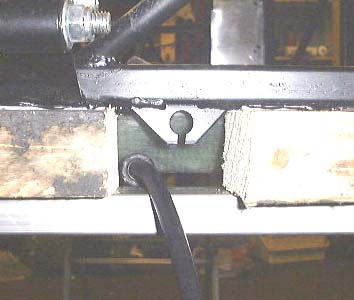 However, I then struck a bit of a
problem. The rear bit of the cable is a single long cable that connects to both calipers and loops around through
a quadrant that is pulled on the by the lever through the front cable. Again, brackets to locate the two legs of
the rear cable are welded to the chassis. However, as this car is the LWB chassis and has the lowered seats, the
brackets are above the level of the seat bottom, meaning that the cable would rub against the bottom of
the seat.
The (rather unpleasantly got at) photo here is looking backwards from the rear of the car. The horizontal member at the bottom is the stand that is holding up the car with the aid of the wooden blocks that can be seen. The chassis bracket is clearly visible, as is the seat bottom just behind, and shrouding, it.
I think I'll have to phone Dax about this on Monday.
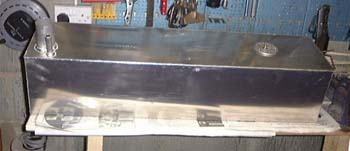 Lastly I decided to mount the fuel tank. First I had to fit the level sender.
This has to have its float arm bent so as to make it fit in the tank. Having done this it seems to have a resistance
range (50 ohms full, 260 ohms empty) that is spookily compatible with the fuel gauge available from Real Steel.
The problem with many of the fuel gauges that I have looked at is that although they say the required range of
resistance of the sender, they don't say which is full and which is empty.
in case you've got to this frame directly and can't get out, go here.