 It's the weekend again, and with luck I'll be able to get some stuff done for
a change.
It's the weekend again, and with luck I'll be able to get some stuff done for
a change.
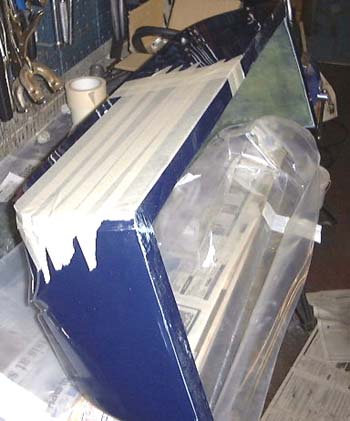
The first thing to look at was the dreaded bodywork, which is still lurking in the background of things I've got to get sorted. I had another go at making the side fit and it still seems very difficult. One worry is that William mentioned that the scuttle overlapped the sides of the car by quite a lot. Furthermore, he he said that putting it in the position mentioned in the manual put it in such a place that the bonnet was not long enough.
So, I decided to have a go at at least positioning the scuttle to see what it was like. The first issue was that the scuttle needs a chunk cutting out of it so as to clear the pedal box. So, I set about cutting the appropriate chunk.
 Once this was done, then I tried fitting the
scuttle in place. It really makes the thing look much more like car.
Once this was done, then I tried fitting the
scuttle in place. It really makes the thing look much more like car.
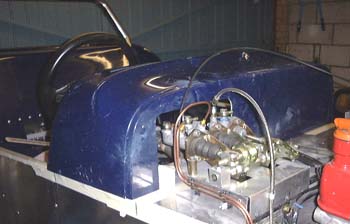
With the scuttle in position, and the nose cone held in place with some clamps, I could check the fitting of the bonnet. Well, I could at least measure it as it won't go on as there's this sodding great carburrettor in the way...
It was quickly clear that William is right, the standard position for the bonnet means the bonnet is about 25mm too short. So, I moved the entire scuttle forward by about that amount and this time things looked much better. Actually, the position of the column stalks vis-à-vis the dashboard looked rather better like this too.
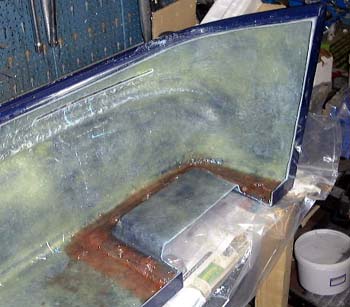 Once the position for that was found I could bung up the hole made for the pedal
box, otherwise the inside of the car would essentially be the engine compartment. Dax supply a GRP moulding for
this, but as the scuttle is now further forward than normal it had to be spaced back a bit. I did this by bolting
it in position with some spacers and then bonding it all together with some GRP.
Once the position for that was found I could bung up the hole made for the pedal
box, otherwise the inside of the car would essentially be the engine compartment. Dax supply a GRP moulding for
this, but as the scuttle is now further forward than normal it had to be spaced back a bit. I did this by bolting
it in position with some spacers and then bonding it all together with some GRP.
All that leaves me with a scuttle that seems to fit OK. The problem is, as William mentioned, it overlaps the sides of the chassis by enough to make fitting the sides rather difficult. I'm beginning to think that the best way to fit the sides, or at least the one that I've tried so far, is to slice half of the rounded moulding off the top, and rely on the bolts under the bottom and the kick strips to hold it in place.
However, I haven't worked up the bottle to do this yet.
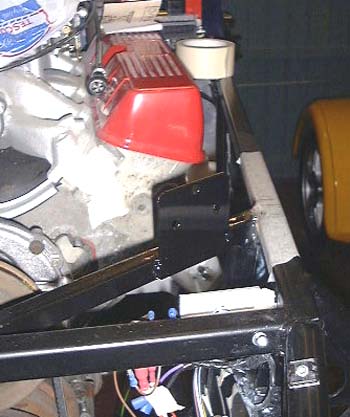
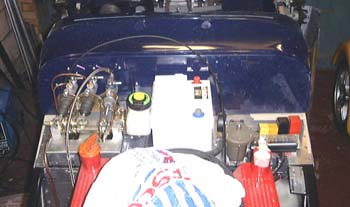 One consequence of all this is that the battery shelf is looking more real now. It's become
clear where the battery is going to have to go and where the expansion tank must fit. I also need to fabricate
a bracket to hold the hydraulic fluid reservoir somewhere.
One consequence of all this is that the battery shelf is looking more real now. It's become
clear where the battery is going to have to go and where the expansion tank must fit. I also need to fabricate
a bracket to hold the hydraulic fluid reservoir somewhere.
You might notice that on the right of this photo there's now a full complement of relays. That's because I bought a flasher unit from Stoneleigh.
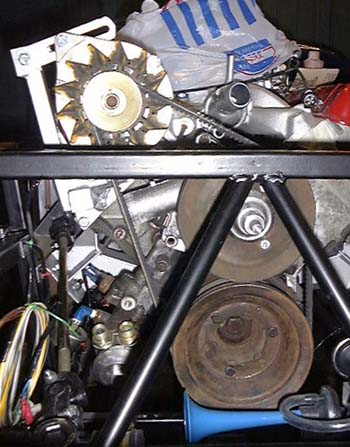 I went to DAP, a local car shop which is distinguished by selling lots of crap for Nova
drivers but also has some staff who know what they are talking about. With their help we managed to locate a fan
belt that should fit the car. I took it home and it does indeed fit. This is good as it means I won't need to reposition
the alternator.
I went to DAP, a local car shop which is distinguished by selling lots of crap for Nova
drivers but also has some staff who know what they are talking about. With their help we managed to locate a fan
belt that should fit the car. I took it home and it does indeed fit. This is good as it means I won't need to reposition
the alternator.
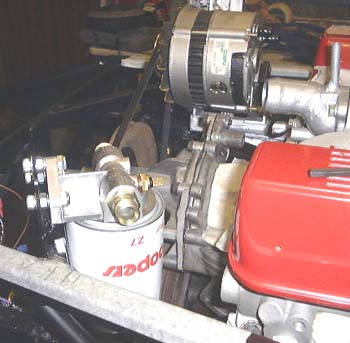
One problem with sorting out the bodywork is that I really need to finish everything off under the bonnet as putting the bodywork on is going to make everything a lot less accessible. So, I had a further look at the oil filter. You can see the unions for the pipes that go to the remote filter at the bottom left of this photo.
 After another looooong time wondering where to put the filter I finally decided that it
was going to have to on on the left of the engine compartment. After some debate I decided where and made a bracket
that would work. This was welded to chassis (the oil filter is a rather chunky beast) and everything cleaned up
and painted to look neat.
After another looooong time wondering where to put the filter I finally decided that it
was going to have to on on the left of the engine compartment. After some debate I decided where and made a bracket
that would work. This was welded to chassis (the oil filter is a rather chunky beast) and everything cleaned up
and painted to look neat.
Unfortunately, the pipes that go to the oil filter are not going to be long enough, so I'll need to do some phoning around soon to get some different ones.
 I ordered some things from Think Automotive to make some oil filter pipes of
the right size. (There is some oil hose in a sexy blue colour that uses fittings that are supposedly push-on. We'll
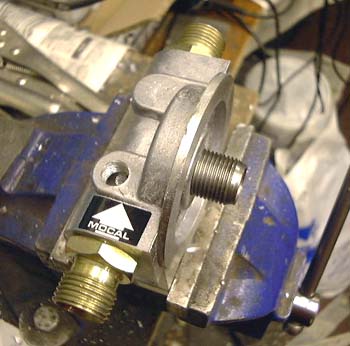
see...) So, I got on with mounting the oil filter. The remote filter housing I've got has some places on it that
may be drilled and tapped for fitting additional sensors. So, I tapped one of these to 1/8 NPTF which is the size
of oil temperature sensor that I've got. With luck it'll be oil tight.
I ordered some things from Think Automotive to make some oil filter pipes of
the right size. (There is some oil hose in a sexy blue colour that uses fittings that are supposedly push-on. We'll
see...) So, I got on with mounting the oil filter. The remote filter housing I've got has some places on it that
may be drilled and tapped for fitting additional sensors. So, I tapped one of these to 1/8 NPTF which is the size
of oil temperature sensor that I've got. With luck it'll be oil tight.
 After that I mounted the filter on the bracket I welded on yesterday and set
about connecting up the wiring for the oil temperature gauge, which means running an extra wire into the loom back
to the dashboard area.
After that I mounted the filter on the bracket I welded on yesterday and set
about connecting up the wiring for the oil temperature gauge, which means running an extra wire into the loom back
to the dashboard area.
Finally, the other people I phoned today was Europa. I ordered some silicone hoses from them nearly a month ago and even though they debited my credited card immediately I'm still waiting and I'm getting pissed off. They say they were expecting a delivery today so we'll see....
I spent a surprisingly long couple of hours adding the wiring for the oil temperature gauge to the loom, taking the loom out of the current fixings and binding the new wire in with loom tape. However, it's done now and sitting expectantly in the area of the dash.
Talking about the dash, I've always intended to make the dash removable by having a large connector between all the wiring on the back of the dash and the loom itself. It's about time I started doing a wiring diagram for the dash side of this, and trying to source the appropriate connectors.
in case you've got to this frame directly and can't get out, go here.