 After getting grey gunge all over my arms, I seem to have decided that I’m not happy with the POR-15 as a chassis treatment. It didn’t seem to be working as well as when I did the same thing to the Fury after setting that on fire. The difference is that back then I’d just had the chassis shot-blasted and that provides a pretty good key for paint-like stuff. So, I think I’m going to get the chassis powder coated and I phoned a local company, GKL Coatings, that Dan has used for powder coating and they sounded pretty competent so I’ll take the chassis there in a while. However, that means I really need to get everything that I want to do to the chassis done as soon as possible.
For example, I’m going to have to sort out what to do about a cage. Well, I could leave that but I’ve decided that making the cage boltable into the chassis is unnecessary and that I might as well weld it to the chassis. Hence, I’ve started work on working out what that should look like. One of the very initial CAD models of part of it is shown above. As when I did this before, it’s quite hard to work out what the cage is going to look like in the flesh.
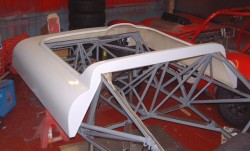
 There’s a problem with welding the cage in, though, which might well mean that I abandon it as an idea. This is that the central part of the bodywork, as shown here sitting laconically on the chassis, fits around the place that the cage rear hoop goes. That means that if that hoop is welded to the chassis, and there are two diagonal braces going back to the rear part of the chassis, then this bit of bodywork needs to become two bits of bodywork which is kind of a shame. However, I am going to have to modify the bodywork rather a lot anyway because I’ve got the long wheelbase chassis which means that the central tub (this bit) and the rear part of the bodywork are actually 60mm apart at the moment. So, I guess that might just be the way it is and perhaps I cut a portion of the rear tub off anyway. It’s a bit of a shame though.
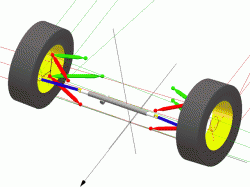
 I’m starting to look harder at the car’s suspension. As part of that I’ve measured lots of stuff and put all the numbers into SusProg, hence the picture at the right which is of the front suspension. This all says that the rear roll centre is 70mm above the ground and the front one is 10mm. TBH, it would be easy to change the pickups to change this but as it stands it sounds a reasonable start.
However, I clearly need to fit some anti-roll bars, much to Jeremy’s chagrin I guess. However, with the roll-centres at this high the roll-moments are going to be significant so the ARBs will be quite useful.
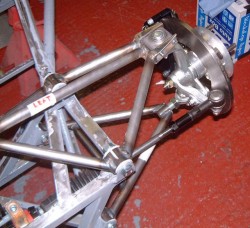
 Hence, I’ve put the suspension on one side all together to get a better idea of where things are going to go, here’s a photo of the rear suspension, complete with driveshaft, and an ARB jauntily attached using some gaffer tape. Not sure that that’s the right place for the ARB though. In fact it might well conflict with the engine there so I’ll need to check this later.
Having decided that I’m going to powder coat the chassis, it means that I’m going to have to mock up a lot of things like this, and then take them to bit again. Oh well…
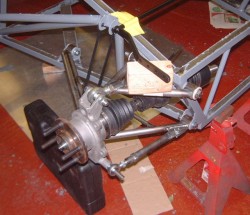
Similarly, the next photo of is the front corner all assembled together. In fact, while it was like this I took the opportunity to just eyeball the bump steer situation, especially because SusProg think the rack should be in a different position. However, it looks pretty good  for now.
I’ve worked out where a front ARB can go, although I’ll need to make one because the Caterham one I bought doesn’t really fit very well. In preparation for fitting that I drilled a couple of holes in the chassis and welded crush tubes in so that I’ll be able to mount that easily later on. And, of course, the tubes can get nicely powder coated later on.
