Not much time available today, as I spent some time helping Jim squirrel away the bodywork for his Westfield in a safe(r) place.
I had realised that I had done some of the wiring for the column switches slightly wrong. The effect would have been that the hazard flasher button (on top of the Sierra column) would not have flashed when the hazards were on. So, I spent a while fixing that and then put my mind to the car itself.
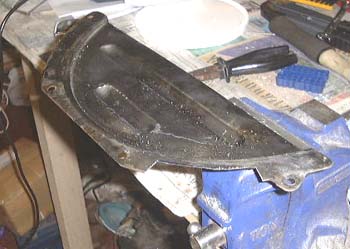 I have come to the conclusion that the thing to do is to go for putting the
engine in next. I order to do this I need to mate the engine and gearbox and attach mountings (now nicely shiny)
to the engine. In order to help the problem with the hole in the grot plate I unbolted it from the engine and cut
a slot in it that I think will clear the slave cylinder mounting. I also spent a while clearing out the various
tapped holes in the bell housing that were obviously unused in its previous incarnation, whatever that was. I then
tried to connect the gearbox and engine together. I always find this difficult; getting the clutch splines and
the input shaft spigot to all fit together is difficult. In this case it is doubly difficult because the Rover
gearbox is a real heavy lump. After grunting and heaving for a while I decided to retire hurt, promising myself
that tomorrow I'll have another go, this time using the engine hoist to take the majority of the weight.
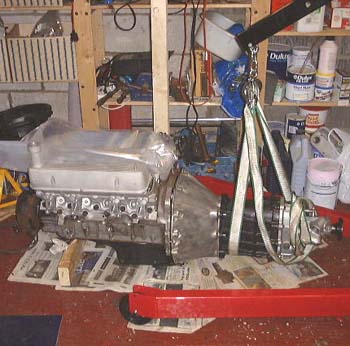 That was easy! I strung up the 'box on the engine hoist and pushed it around
to it was just in position and with a bit of judicious wiggling on the gearbox output shaft (I put it in gear first)
it connected up. No problem!
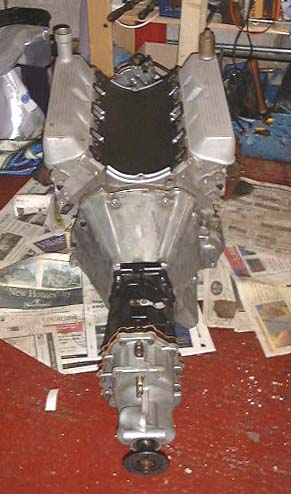 Time for another extended car building exercise, as it was a Saturday. With
any luck, I would get the engine into the chassis today. The first thing was to put the engine mounts onto the
engine which was fairly easily done. I then fitted the rocker covers (without the gaskets as yet) and the valley
gasket so as to keep any unnecessary grot out of the engine.
As I would have to be lifting the engine I had been wondering for a while how to do so. I could have just wrapped ropes around it but that never seems to work very well. I ended up putting some bolts into some holes on each end of each head with some large washers on them. I could then tie ropes around these studs. I'm pretty sure that the holes used are those to which the pukka engine lifting loops attach.
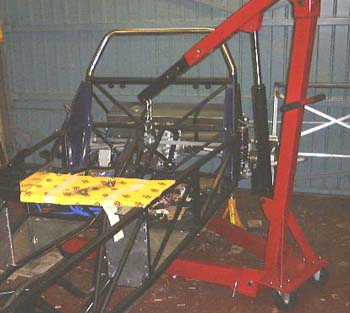 Next, after the experience gained in fitting the engine into the Westfield, I lowered the car down onto a combination of axle stands
and building blocks. In fact it was rather lower at the front than at the rear, again from bitter experience. In
fact, I noticed in the Haynes Rover 3500 manual you have to do the same thing to take the engine out of the original
saloon.
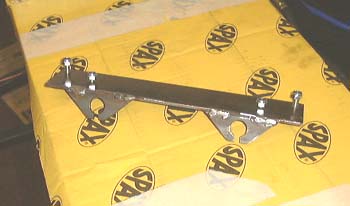 Eagle eyed readers will be wondering what that gadget is
on the battery shelf of the previous photo. It's a thing for repositioning the handbrake cable guides as discussed
before. Gary at Dax had made it up and it was delivered
by William and Richard, cam7ers who had been down to Dax this morning. (They are both planning on a Rush build
and are trying to decide what colour to go for.
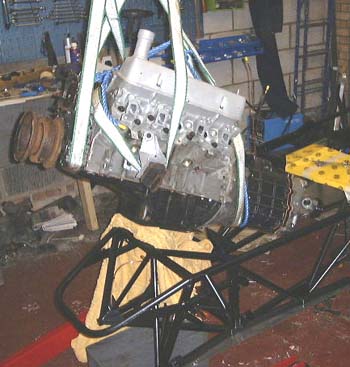 So, it was back to putting the engine in. I lifted it up, arranging it to be
in a naturally gearbox-down attitude and twizzled the hoist around so that everything was pointing in the right
direction. I then slowly started lowering the engine and pushing it into the chassis.
Although there are lots of ropes in this photo the only ones actually doing anything are the blue ones, the rest are a sort of security blanket for my highly developed sense of paranoia in these situations.
After the engine had gone in a fair way it was obvious, as I had previously thought, that it would be better to take off the crankshaft pulley, which on this engine is a truly huge contrivance as you can see here.
That eased things a bit and progress continued. After a while I put the trolley jack under the tail of the gearbox and started to lift it as the front was lowered by the hoist.
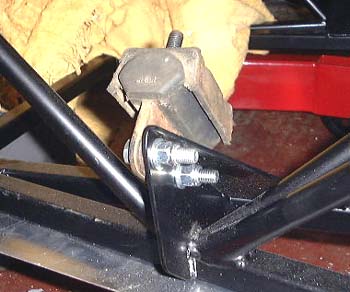 The photo above has both parts of the engine mounts in place, the steel brackets
attached to the engine (still shiny!) and the black rubber devices. After
some manouvreing it was obvious that like this the engine was too wide to go between the top chassis rails. So,
I took the rubber mounts off and bolted them to the chassis mounts themselves.
Somewhat later it became apparent that the best thing to do was to get the metal parts of the mounts through the top of the chassis and then bolt the rubber mounts to them, as it's rather easier to bolt the mounts to the chassis than the rubber mounts to the steel mounts.
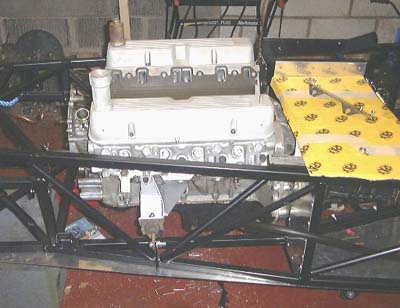 After I did that a small amount of fiddling around had the engine mounted properly, although
I have still to put the nut on the gearbox mount.
Of course, there are lots of engine ancillaries still to attach, most obviously:
- crank pulley
- water pump
- oil filter
- starter motor
- alternator
- clutch slave cylinder
and probably a bunch of things I've forgotten. All the same it feels like a huge step forward. What's more it has returned a large chunk of garage to use, the bit that the engine was sitting in before.
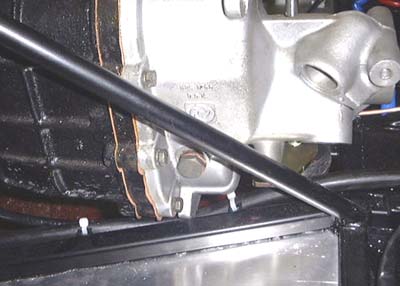 After that I had a good look around to see how things were fitting. It looks
mostly OK, except that the fuel pipe is slightly snagged and it looks essentially impossible to fill the gearbox
with oil with the footwell side panels in position. Clearly, I can fill it before fitting the panel but it looks
as though it will be a one-shot operation.
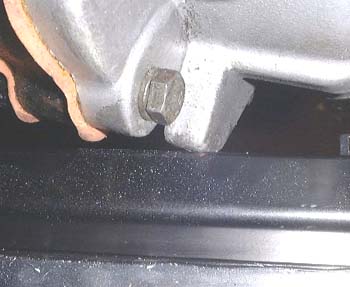 I had another careful look around the engine. I realised that the obvious way
to fill the gearbox is to put a hole in the footwell panel and fill it with a grommet. However, I also noticed
that the gearbox, as can be seen above as well, is actually touching the chassis slightly. So, I jacked up the
rear end (I had still not put on the nut on the gearbox mount) and ground off some of the lug on the gearbox. I
then dropped it back and did up the mount. There's now a couple of millimetres spare.
I was musing about the amount of time spent on the car so far. I've just passed the 200 hours mark (see the diary) and I must be about 1/3rd of the way through. This thing is going to take ages yet.
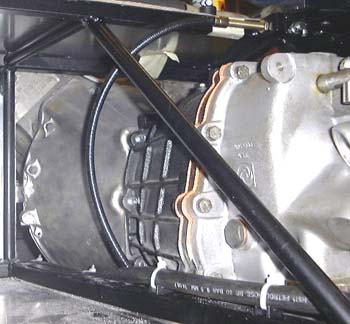 I had a look at the fuel hose and came to the conclusion that it is going to have to be
rerouted to stop it touching the gearbox. I'm concerned that if it does it will eventually chafe through. The only
thing I can think of at the moment is routing it up the diagonal tube shown and under the battery shelf. The latter
bit could be quite convenient if I decide to mount a fuel regulator on the shelf.
I also finished off fixing the grot plate on the back of the engine. It's actually easier to get at now the engine is actually held off the ground.
I want to get the car back on the stands properly. It will be easier to support if the rear stand is rather wider than it is at the moment, so I'll try and get some steel tomorrow to weld across the top of the stand to widen it. I could use a chunk of wood but the steel has the benefit that it will not move.
Not much time today, but enough to weld some additional bits of steel to the Westfield stands. Hopefully this way it'll be easier to hold up the Rush.
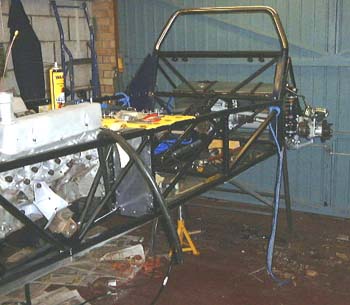 I think I've decided that I'm not going to have to take the engine out again,
which was always a possibility. Hence, I can feel more confident about putting it back up high on stands, so I
did so.
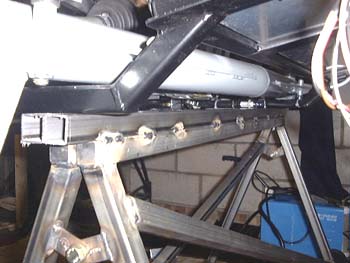 The modified stands work great, much better
than the rather Heath Robinson arrangement that I had before.
After that I had another look at the gearbox/fuel line issue. I convinced myself that with some care taken with an alternative mounting method, the pipe would be fine.
So I did so, along with the aid of a few P-clips.
in case you've got to this frame directly and can't get out, go here.