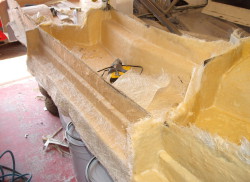
 To cut a long story short, I finished making all the moulds. It’s really not a pleasant job and I can see why the general consensus is that you get someone else to do it for you. You just spend forever putting more and more resin and matting in place, with the corollary in my case that the whole house stinks of resin.
In the photo here you can see all six moulds on the right hand side of the car.
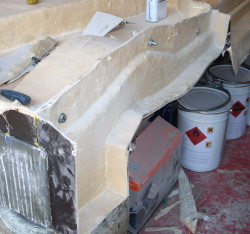 The next step was to crack the moulds off the buck. Sounds easy, but is terrifying… First thing, though was to drill through the pairs of moulds and drill for some locating bolts so that the various mould sections can be connected together for laying up the mouldings themselves.The photo on the left shows the right/rear mould with the various fluffy bits cut off and some M10 bolts holding it all together.
In fact, at this point we couldn’t resist it and popped off this particular mould. It came away very easily and showed that, indeed, all the imperfections in the buck had been faithfully reproduced in the moulds. Oh well…
With a 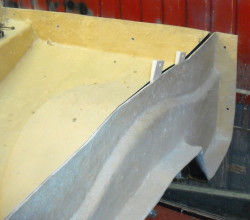 test one done it was then a case of going around the smaller, outer, moulds first and popping them off. I used some little plastic wedges that we bought to bash between the various flanges, as shown in the next photo. In most cases the moulds just fell off, usually leaving a hunt for the wedges in its wake as they went clattering about the floor.
With the smaller bits off it was time to try releasing one of the larger moulds. We reckoned that the angles on the front mould meant that that would have to be tipped backwards to release and so we had to work from the rear of the car forwards.
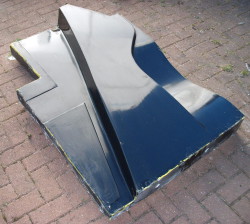 So, starting work with the left rear inner mould (the one on the left of the photo with the wedges) I started shoving most wedges in. This was worrying because if the mould release angles weren’t right it’d never come off cleanly. However, if popped up stupidly easily and (luckily it was a nice sunny day) the next photo shows it resting on the drive.
As before, all the buck’s imperfections are here but that’s about it which is nice. OK, it’s not going to be concours standard but hopefully it’ll be vaguely acceptable.
With that success under our belts we pressed on and, to be honest, it was all a bit of an anticlimax as everything came off pretty easily. The only things that were slightly recalcitrant were the flanges which had taken a bit of a liking to each other in a couple of places and had to be forcibly separated.
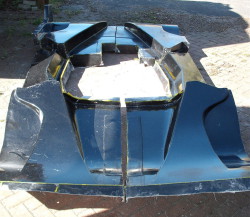 Once done, though, we put all the larger mould pieces in the right orientation on the drive. Yes, I know it looks kind of batmobilesque…
So, I now had the buck back in the garage. It looked for all the world like nothing had happened with just the odd bit of filleting wax left behind to remind you that it had looked dramatically different just an hour or so before.
The thing that had always worried me about the buck was whether it was going to collapse under the weight of the moulds, which I reckon are probably in the region of 150kg. (There’s about 80kg of resin gone into them, not counting the fibre.) Just for fun I lifted myself up on the buck (I’m not 150kg but I’m not exactly a lightweight) with no discernable effect. The power of wood, staples, nails, tie-wraps, screws and hot glue is clearly better than you’d think.
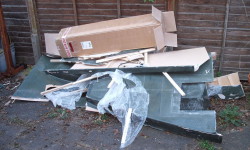 Nonetheless, we don’t need to buck anymore so, after some considerable amount of musing, we smashed it up… Here it is, albeit with the addition of a cardboard box.
There’s several hundred hours of work in this, I dread to think precisely how many. It took us about 40 mins to reduce it to this pile of rubble. Although it was surprisingly strong it’s also alarmingly easy to break up.
So, that’s the end of one major activity. Next thing on the bodywork is to clean up the moulds, try and rub out the worse of the imperfections, and start making mouldings. Hopefully they’ll be a bit lighter than the moulds themselves… In the meantime I want to get the car back where I had it before. Ideally, I’d like to put it on its wheels so it’s possible to get it out of the way of moulding activity…

I thought this major milestone might elicit a blog update.
BTW I’ve still got a wedge in my pocket… Currently sitting on my kitchen table.
Do you want to bring the side moulds in to work And I’ll take take them home to clean up and do the mating flanges. Probably easier to do the “first” flanges on the sides. And then offer them up to the larger end moulds to make the partner ones. Also gives you a bit of space to concentrate on cleaning up the garage for a bit
Also we definitely need to smooth off the backs. I’ve been reading the easy composites site and the backs of the moulds will definitely puncture the bag.