 … supposedly come along in threes. Not sure about that, but it does appear to apply to posts.
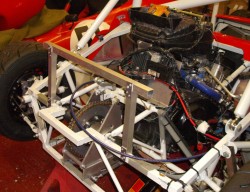
With loins girded, I set about getting the bodywork finally sorted. As I said, I took off the hinge that was locating the engine cover (the steel tube at the bottom of the photo) and added a couple of little aluminium supports (just above the steel tube).
Those actually supported the engine cover surprisingly well. However, I wanted to put some support in the middle of the bodywork; should I ever manage to generate any downforce I wanted something for it to act on. I also want something to tie the engine cover down to. Those little ally ledges work fine in the garage but if the bodywork starts to lift I’ll be in real trouble.
 So, I made this structure which looks kind of odd, and emphasises how far above the chassis the bodywork is. It’s just made out of some aluminium section. I could have made it out of steel welded to the chassis but that seemed over the top for something that should just be taking a compressive load. I might triangulate it a bit though…
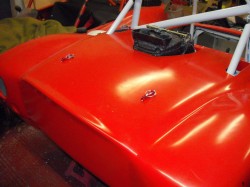
As well as using this support to, perhaps, taking some download onto the chassis I could also use if for holding the bodywork down, perhaps the major reason. So, I fitted some bonnet pins to this same support and used them for that job. All  I’ve got to do now is to fit, remove, refit the bodywork a thousand times or so until they’re adjusted right. Yes, it’s a bit tedious…
The only problem left with the rear bodywork, apart from the fact that I’ve bashed up the paintwork, is that there’s still a socking great hole at the front of it, as mentioned before. I’m planning on filling this with some sort of ally panel; in fact I might even cut even more of the GRP away to fit this! I’m thinking that if I do this right I’ll be able to make a removeable panel that will allow access to the plugs, seal up the hole in front of the airbox and assist in locating the front edge of the engine cover. Or, it could look horrible… One issue is how to make it easily removeable. One possibility for locating the front of it would be to use the upper harness mountings. However, having to take the harnesses out to access the plugs seems a trifle ostentatious.
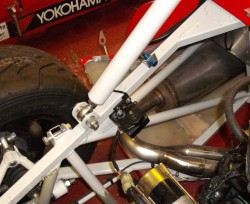
 While at the back of the car I did a little job I’ve been meaning to do for a while. I attached the EGCV (exhaust gas circulation valve). Normally this sits in the exhaust twiddling a flap backwards and forwards and without it the ECU isn’t so excited and you end up about 8bhp down. Of course, it’s not in the exhaust here but the ECU doesn’t seem to mind. It’s the little black thing attached to the chassis in the centre of the photo.
With the bodywork on I actually started the engine and let it run for a while. And, then I stopped because there was a lot of smoke. I think this is the header wrapping settling in, although I wonder if it’s actually falling off as well. I’ll have a look tomorrow.
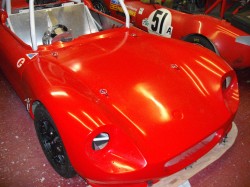
 With the engine cover nearly sorted, I also wanted to improve the location of the bonnet. (I’ve decided to call it that, even though there’s no engine under it.) Again, this was done with some bonnet pins; I bought a collection of these absolutely ages ago when I started building the car. I had no idea it’d take me so long to get around to using them.
You can see four of these pins in the photo. You might well wonder why there are so many. Well, there is method in my madness. At the front of the car the bonnet is attached to the splitter. Experience with splitters is that they’re dead easy to wipe out on things like gravel traps. As and when that happens it’d likely be torn off and also damage the bonnet to some extent. The idea with putting so many supports for the bonnet is that even if it does get damaged at the front I might well be able to patch it up and continue racing, even if without a splitter.
Another issue that I’ve got to solve is how to connect the lights. I’ve got a connector at both the front and back of the car for the lights wiring. However, I need to be sure that I can, single-handedly, connect and disconnect this while manoeuvring the bodywork into position. Sounds quite tricky.

Rather than hard-to-reach connectors, couldn’t you have the rear lights mounted to the chassis and just have holes for them to poke through in the bodywork, a la various Furies on the grid? OK, so it would be hard to do a number plate light in that manner, but then not all the cars on the grid have number plate lights anyway (even though that does mean that technically they’re not complying with the RGB rules).
I did wonder that. However, it’d be a bit of a pain fabricating some mounts when there’s already a big chunk of bodywork in just the right place. I think I’ve worked out how to do it now anywa, with some cables dangling down to a place where I can reach them. I think…