 As part of the airbox cover that I showed you in that last post, I’ve been working on how to get air into the airbox in a rather more organised manner than I’ve done before.
Rather than some of my wilder schemes, of which I’ve an endless supply, I decided to go the tried and trusted route of ducting air from beside the driver’s head into the standard airbox using the standard air filter of which I’ve got a snazy K&N one. In order to do this, though, I’d need to make some more composite materials which meant yet more dust and yet more rubbing down.
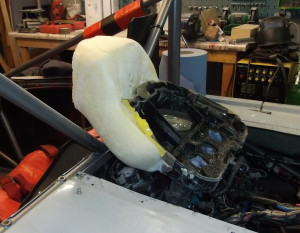
 The first step this time was to make a buck that was the sort of shape I wanted. I covered the bottom of a standard Honda airbox with packing tape and then erected some fences and poured in some expanding foam. At this point various leaks appeared and there’s still a fair bit of expanded foam stuck to unfortunate bits of the workshop. Ignoring that, I ended up with the extraordinary construction at the top of the page.
After that it was a whole heap of cutting and hmming and harring in order to work out what I wanted it to look like. the end result is shown in the next photo.
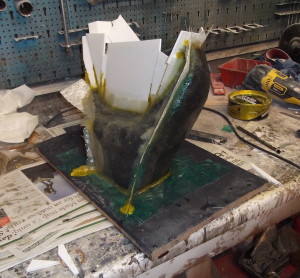
 At this point I needed to transfer the shape into some sort of composite material. So, I set about the inevitable, and very familiar, processes of adding filler and then turning most of it into dust. After what seemed like an eternity I ended up with this shape. In this case, I’ve removed the buck from the airbox (and not broken it in the process!). I’ve glued it to a baseboard, using hot melt glue, so as to be able to work on it.
I then added a final layer of a couple of coats of pattern base coat. I didn’t bother with the final step of adding a gloss coat because this part should be hidden in the bowels of the machine and I don’t really mind about the finish.
 At this point I had a bit of an epiphany when I realised that if I carried on in the usual manner then I’d make a mould and then the final part which would be shinyish on the outside and rough as a rough thing on the inside. What’s more, the shape of the part is so complex that a mould would have to be made out of 5 or pieces to have any chance of removing it from the buck.
So, as a quick and dirty alternative, I mould released the buck itself, made some fences and made some final parts from the buck itself. That left me with what’s in the next photo. I know it looks a bit like a very avant garde award in some competition but it’s the same thing, trust me.
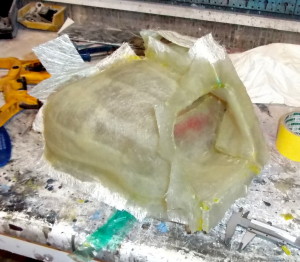
 The big advantage of doing it this way is that I could lay up the parts really thin and get something that was flexible enough to get it off the buck in just 3 pieces. Once I’d got those pieces then I bonded them together with some structural epoxy leaving me with the final photo here.
I can now trim the split lines and then bond it onto the airbox itself, probably with some polyurethane adhesive which I think should actually stick to the surfaces in question. (That’s the stuff that your windscreen is stuck into your car with.)
Needless to say, while all this has been happening the world’s been ticking away and the season is starting to peer around the corner at me. And, inevitably, my to-do list is continuing to expand inexorably. Ho hum…
