
Another year, another season. So, right at the start of the year, it’s time to tell you what I’ve been up to and, more importantly, what I plan on being up to. I’ve got a bit less time than I had in that having been “retired” since last January I’ve now actually gone and got a real job again. (Well, real-ish, if you count being an academic as actually working…) It’s only 80% of my time though, so there is at least Fridays.
All the same, the arrival of the New Year is making me think about what’s coming with more of a sense of urgency. As such, I thought I’d share with you (I’m coming over all New Ageish here) my list of jobs so you know what I’m up to.
So, the to do list includes:
Make a crash box to support the splitter a bit better.
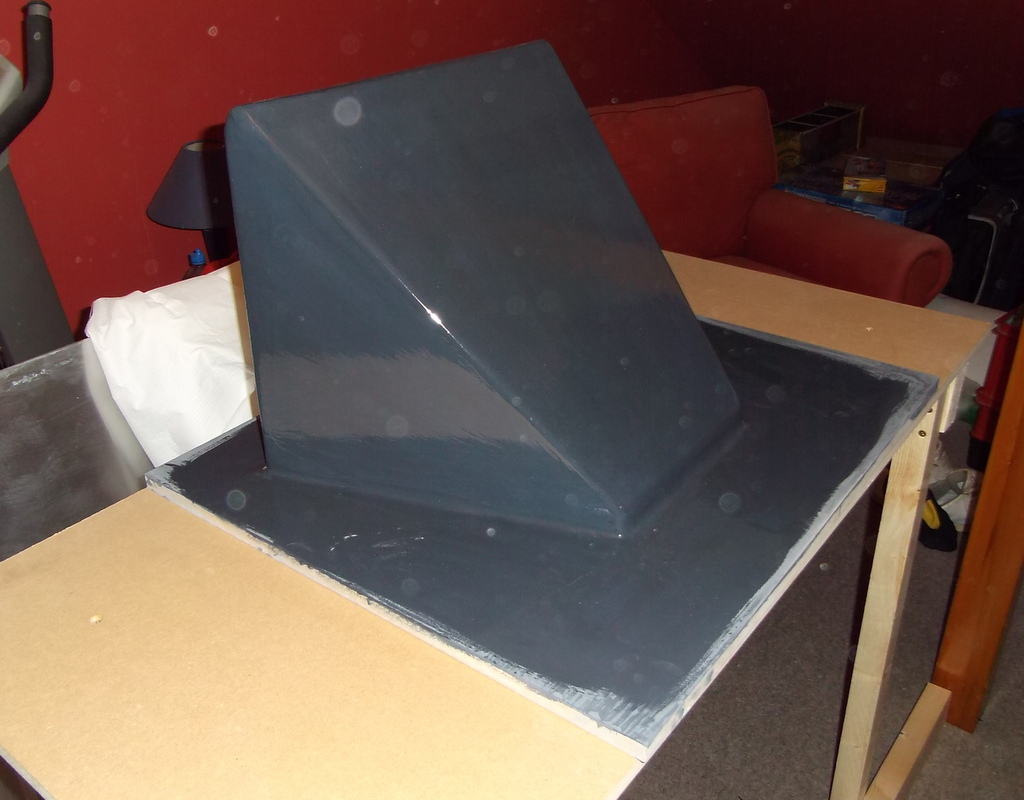 I had actually made quite a start on this. In fact, here’s the mould I made, out of 18mm MDF in order to make a carbon fibre part. However, when I set about making the part, using the vacuum infusion technique which means the whole thing goes in a vacuum bag which squashes the reinforcement (and the mould) as the resin is sucked in there were some ominous creaks from the mould. These were so loud that I started to seriously worry that something bad was about to happen and, indeed, it did in that the rear face of the mould (round the back of the photo) collapsed in a flurry of broken MDF and epoxy resin.
So, that was annoying and I decided to concentrate elsewhere before returning to that.
Make some nicer sidepods in carbon fibre
My sidepods, if you remember, I lashed together out of aluminium in order to get the car out on track. I spent a while weighing things and worked out that using a reasonably strong CF layup (I made a lot of test pieces) then if I remade the sidepod sides, the sidepod floor (which is made out of plywood) and the sidepod tops (currently glass/polyester mouldings) then I could save about 10kg which is not to be sniffed at.
So, I’m attacking this at the moment. First of all, I made a mould for one 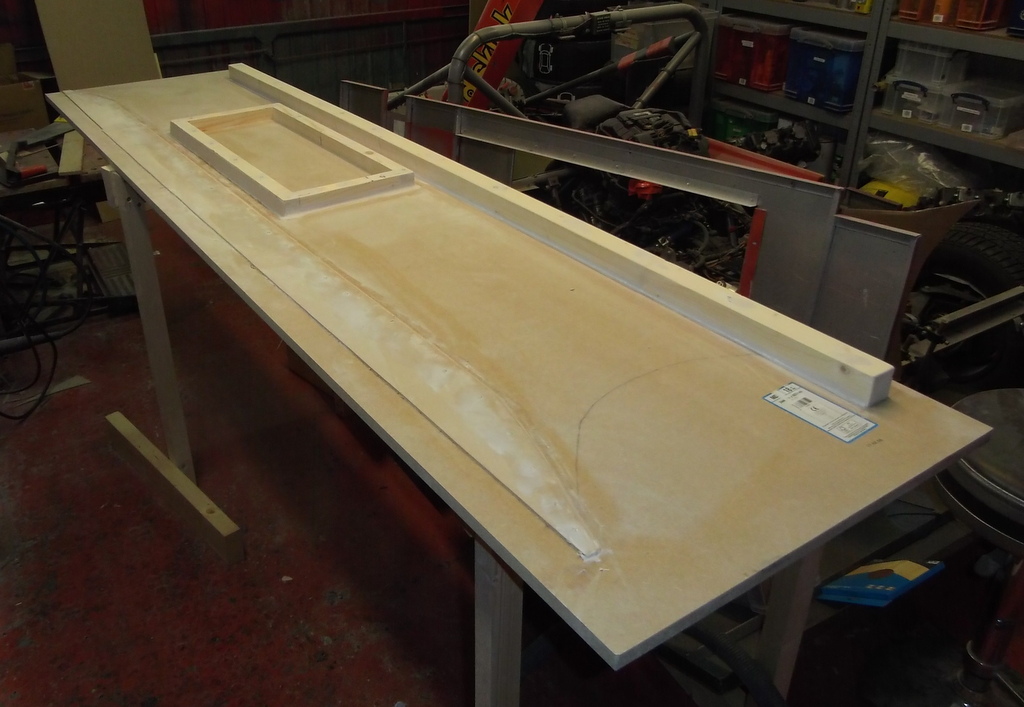 side (annoyingly the sides are subtly different) out of MDF and wood, as in the photo. I then went through the tedium of putting pattern coat primer and gloss onto the mould and doing copious amounts of rubbing down. (A top tip, though, is to buy a DA-double acting-orbital sander. There’s a reason you see them in all those programmes on the TV like Wheeler Dealers…)
Finally, I laid up some carbon fibre into this mould, envelope-bagged it (where the entire mould goes into a giant vacuum bag) and infused it with 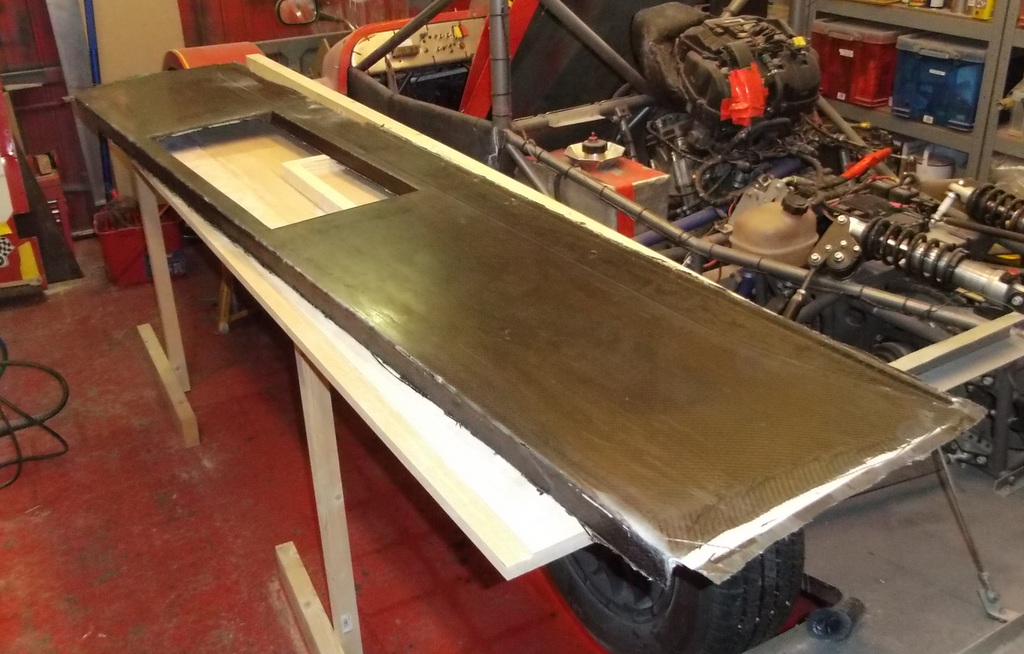 epoxy resin. The end result looks like the next photo. Note that it’s sitting on the emerging mould for the other side of the car. This moulding is quite ridiculously light, but as far as I can see it’ll do the job. It’s also got a slight rebate around the top side of the mould (on the right in the photo) which should allow the bodywork to sit “inside” the side making the side of the car flush which should look better.
 The moulding isn’t particularly shiny, but as I’m planning on painting it that’s no big deal. In fact, it’s probably better. It does have that authentic carbon fibre look though, see the detail photo. Unlike all that sticky “CF” fablon, though, this is the real stuff.
The fact that you can make this stuff in your bedroom (the room I laughingly call the “composites workshop” is, in fact, Tom’s old bedroom and is also home to my rowing machine) is amazing really, Mind you, it’s a tediously slow process; it too me most of a day to lay up this sidepod although I wasn’t really going particularly quickly.
Change engine
I’ve got a nicely refreshed engine sitting on the floor of the garage waiting to go into the car. I’ll then either get the current one refreshed or just keep it as the spare. I must work out what to do with the two broken ones that are also in the garage.
Change chain and sprockets
I’ve got a nice new chain to fit and also a nice new driven sprocket. I’ve actually decided to convert to using a non-split sprocket; I didn’t change the driven sprocket all last year and splitting the sprocket always seems to give you slightly high spots in the chain run.
The problem is, changing the sprocket means taking much of the rear suspension and transmission apart. In fact, all of it… There is, however, a silver lining:
Remove handbrake disc and fit hydraulic line lock
The regulations are changing to allow us to use hydraulic locks in the 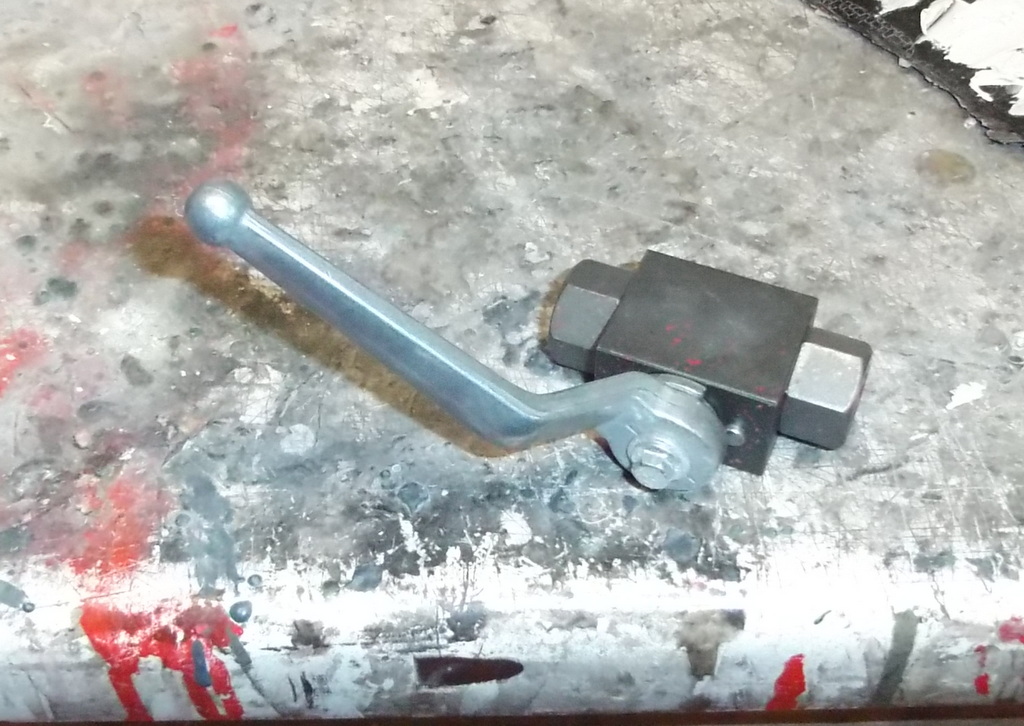 rear brake line for a handbrake. This means that I can take off the handbrake disc, the handbrake lever and cable and the handbrake caliper and consign them to the parts bin. I will, of course, have to fit the line lock, seen here, inside the car in much the same place as the handbrake lever is now. Annoyingly, the line lock doesn’t actually have anything like a mounting flange so I’m going to have to fabricate some sort of pressure fastening.
Support rear deck better
The rear bodywork really needs a more robust support mechanism so I’ll make something to do that.
New splitter/front bodywork infill part
Since I dropped the splitter I’ve had a rather ugly wall between the splitter and the front bodywork. It’d be nice to make something neater, but that may well be too much for the time available.
New bodywork
Since smashing up the front bodywork at Brands last season I’ve wanted to make some new front bodywork. It’d be nice to make a CF part but I doubt I’ll have time to do that. I could, though, make a new glass/polyester moulding without too much difficulty. I might even be able to make it a bit lighter too…