 So, you will remember from last time’s gripping installment that I’d decided to bite the bullet and get an ’08 engine. But, before rambling about that, here’s a half decent photo of the car at Brands earlier this year, albeit before aero mods and the improved oil cooler ducting.
But, I’ve started messing about with the car again and, after parting with a significant quantity of earth pounds, I drove up to Andy’s to pick up the new engine. I borrowed Anthea’s car to get it, I thought it’d be easier to fit in 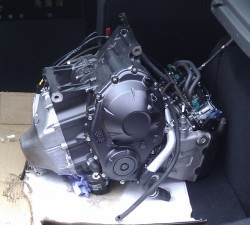 the boot, and here it is sitting disconsolately there, wondering what life has got in store for it now.
Of course, when it finds out that it’s got a life of glamour and excitement in the 750 Motor Club ahead of it it’ll doubtless be quite pleased with how life has turned out.
As you can see, the engine’s alarmingly clean, although I’ll doubtless change this. I don’t know how it happens but race cars tend to get pretty grimy pretty quickly. I suspect those F1 cars that you see on the TV only stay like that because there’s an army of minions polishing and cleaning all the time.
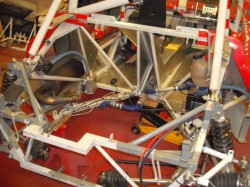 In the meantime I’ve taken the ’07 engine out of the car which leaves this big hole in the back. I have to admit that, realistically, I don’t think I can get the upgrade done by the next race meeting so I’ll have to swap the engine back. I don’t think that’ll be too big a deal as long as I don’t do anything too precipitous.
At least this gave me a chance to have a bit of a clean up, like this it’s easy to blast brake cleaner at everything in order to clean it up. While this is off I can arrange to improve the heat insulation. There’s a small problem in that the plastic coating on the handbrake cable outers has suffered from proximity to the exhaust, as in the photo. I’ll replace the outers, I think I’ve got quite a lot spare and then extend the existing 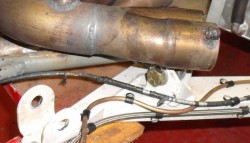 aluminium heat shield (which isn’t in the photo above) and probably put some of the layered aluminium/glass stuff I’ve got on the back of the driver’s seat backpanel there as well.
Interestingly, the P-clips that you can see in the photo are fine, perhaps the coating on the cable outer is just particularly heat sensitive. The cables actually work fine even like this.
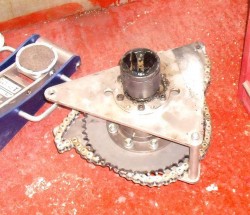 So, I need to get stuck in and make the mountings for the new engine. There’s a couple of problems with this in that I need to make absolutely sure that the diff and sprocket, seen here languishing on the floor, is in exactly the same position as it was before. Also, although Andy’s supplying a billet sump at the moment all I’ve got is the standard one, as in the photo in the boot of the car above. That’s a bit tricky as it’s pointed and the engine won’t sit right on it. So, first thing will be to make some sort of arrangement to hold it in the right sort of position and I can then see about attaching the mounts.
Oddly, these are going to be different with the engine because there’s only a single attachment boss on either side of the engine at the top of the block, unlike the two on the ’07 engine. At the moment I can’t decide whether this means I need to add some additional (and heavy) triangulation onto the chassis or whether the rear mountings are sufficient.
Once that’s done I’ll have to sort out the electrics which are rather more complicated with this. engine. However, as before I’ve got the complete bike loom from which to start. First step will be to strip that down to the basics without all the lighting gubbins.

good luck with the engine change
when i had emilys engine out i made a rectangle of wood that fitted around the sump bolts it ment it sat level and secure without bashing and sratching the sump. and being wood you can put nails in to secure ropes to. it was so simple and easy i’m supprised more people don’t make one. all be it mine was a square ballanced lump of cast iorn. and yours is an tippy over webbed design i’m sure it could be adapted.
INteresting! Someone else made much the same suggestion and that’s what I did. Watch out for some photos in a while.
Thanks!